 The below article is excerpted from Treasury of Vintage Homekeeping Skills by Martha Greene
Soldiers, Confederate soldiers in particular, depended on hardtack, a hard cracker, biscuit shaped, made from flour, salt, and water. Hardtack, was a staple food of choice because it was easy to carry, did not readily spoil, had the additional advantage of being lightweight, and was not subject to crumbling . The salt in the crackers protected soldiers from fainting during the brutal, hot, sweaty summer weather. Soldiers gave hardtack nicknames like "iron plate biscuits" and "teeth cullers" because of its tough, hard, almost solid consistency. Sometimes the crackers might contain weevils and maggots which would burrow into the hardtack which was then referred to as "worm castle".
The best way to eat hardtack was to dip it in water, coffee or tea. That practice softened the cracker enough so that it wouldn't break a solder's teeth, and, if the beverage was hot enough, would also kill the bugs. Soldier's were known to break hardtack into small pieces with the ends of their guns instead of their teeth.
As the war progressed, shortages of all kinds of food prevailed particularly among the Southern troops because of railroad service disruptions and other war related factors. Hence, foraging, scavanging, and rummaging for food in fields and forests supplemented meager or non-existent rations. Fresh meat became rare and the men learned to hunt for any available squirrels, rabbits, and other wild game they could find to be added to soups and stews. Sweet potatoes were a treat when no other sweet food was available. They could be baked in campfire coals, or mashed to prepared Sweet Potato Pudding and other tasty desserts. As you can imagine, anything to break the monotony of the hardtack, hoe cake, and spoiled meat diet was welcomed by the men.
Fresh fruits and vegtables were often scarce since women and children had to perform all the household tasks, animal care and many other farm tasks without the help of the men.
The drastic scarcity of salt, sugar, wheat flour, coffee, tea and other staple foods caused the Confederate soldiers and families at home to rely on many substitutes such as cornmeal in place of white flour. The Confederates used cornmeal to make hoe cakes, a corn meal mixture cooked on hoe blades over a fire. Fried cornmeal in the shape of large cakes were known as pones. Confederate cornbread probably was prepared without baking powder, unlike the Confederate Cornbread recipe.
Prior to the war, peanuts were grown primarily for pig food or export to other countries however, with meat sources very scarce soldiers often ate peanuts in place of meat as a protein source. Since peanuts were easy to grow, and stayed fresh a long time, they could easily be carried in small bags during long marches, or roasted over fires before eating them. Southern cooks learned to depend on plentiful peanuts and the nuts were prepared into candies such as the Peanut Brittle Recipe, below, a hard candy which could be shipped to soldiers for a rare treat.
Packages mailed from home to Confederate troops at times offered an array of food items such as sweets, breads, smoked meats, and vegetables. Sweets might include apple or cherry pie, honey and jams. Familes might pack butter, pickles, apples, pears, cheese, and nuts into the boxes sent to soldiers along with other needed items such as candles, blankets, soap, books and clothing. With unreliable mail services, personal messengers often delivered packages to the soldiers to insure that the foods could be enjoyed before it spoiled.
Union soldiers were, in general, better fed than the Confederate Army because they had more money and better supplies. A Union soldier's daily camp rations included upt to12 ounces of pork or bacon, or 20 ounces of salt or fresh beef, and 22 ounces of soft bread or flour, or 16 ounces of hard bread, or 20 ounces of cornmeal. And, for every 100 soldier's rations, they were supplemented with additional rations including beans, peas, rice or hominy, coffee, sugar, candles, soap, salt, vinegar, pepper, potatoe, and molasses.
Most of the cooking was done by the soldier's themselves, divided into small groups called messes, who cooked over open, hot, smokey fires with heavy cast iron cookware. Dried beans such as kidney, navy, pinto or waxed beans might be eaten three times a day. Beans placed in hot coals in a hole in the ground, would cook through the night. Salt pork or other available meats added flavor and any fresh or dried vegetables or greens and potatoes also went into soups such as the Navy Bean Soup.
Like their Confederate counterparts, Union soldiers foraged the countryside for fruits and berries. Fruit cobblers or pies, prepared from berries after a successful foraging trip, would also be baked on a bed of hot coals inside cast iron dutch ovens. Apples could be enjoyed from August through October. Often the men would thinly slice apples, and dry them in the sun, so they could be safely e stored and enjoyed through the winter months. Dried apples, excellent vitamin C sources for soldiers, helped prevent scurvy, a bleeding gum disease. Reconstituted apples could be prepared into Skillet-Fried Apples or made into pies for a sweet dessert.
Despite the hardships and shortages, both Northern and Southern families at home as well as the troops in the field, found ways to incorporate Christmas celebrations with traditional foods and special meals. Southern families lacked the food to make big dinners but did their best to set aside some special food for the Christmas holiday. Slaves celebrated New Year's Day with Hoppin' John, a mixture of black-eyed peas and rice, ingredients that were uksually available even during the food shortages. Northern families saved precious sugar and butter resources during the year in order to prepare special treats for holiday celebrations such as Tea Cake Cookies and Gingerbread.
It has been said that an army travels on it's stomach and you can see how the outcome of military conflicts could hinge on how well-supplied the soldiers are. One thing is sure, some of our traditional foods of today, such as sweet potato pie, cornbread, Hoppin' John, peanut brittle and others trace their origins back to the difficult days of the Civil War food shortages. Families who wish to maximize Civil War Era battlefield reenactments with tradtional recipes will enjoy the most authentic ambience when the foods are prepared in stoneware or wooden bowls, cooked over open fires in cast iron pans , and served on tin plates.
Valentine's Mother Daughter Tea
By Beth Holland
Valentine's Day is a time to think of those you love and spend
time with
them in a unique way. What could be more fun than to have a
Mother-Daughter tea? Every little girl loves to have a tea party
and
this one can be extra special because Mom is going to get dressed
up,
too, and take her little princess to a real tea, complete with
china
(that makes it extra special), goodies and friends! Tea time is
a
wonderful way to slow life down, to de-stress, and to build
relationships and memories with the ones you love.
If you've never done this, I highly recommend it. Tea can be
as simple
as a cup of tea and anything you have on hand for a snack, or
it can be
as elaborate as you can imagine: silver tea service, fine china,
sterling silver and a butler in white gloves. However you have
a tea,
don't lose the heart of it: time with your loved ones, time to
sow into
them by listening, by laughing together, by being exclusively
available
to them.
Valentine's Day lends itself to some wonderful possibilities.
It can be
all pink, frilly and fun with the refreshments all being heart
shaped;
it can have a themed tea like a special tea cup tea where each
person
brings a tea cup and tells its story, or a hat tea where everyone
comes
wearing a hat, or a cookie or cake tea where everyone brings part
of the
tea, or a teddy bear tea where each daughter has tea with her
Mom and
her favorite teddy bear, or how about a chocolate tea, where all
the
refreshments have some sort of chocolate ingredient? The possibilities
are as endless as your imagination!
Years ago, a home schooling friend who grew up in England introduced
my
family to the tradition of tea, its history and rituals. We have
been
partaking tea ever since. As my girls have gotten older, (my eldest
is
now in college) they have become more enthusiastic about this
time set
aside for fun and fellowship, knowing that Mom is totally devoted
to
time with them, puts everything else aside, (including the telephone)
and is exclusively "theirs." We giggle and talk and
they have had the
privilege of feeling grown up as they began to bridge the world
from
adolescence to adulthood.
It's also a good time for concentrating on nice manners as
the children
focus on the traditions of tea, and how to do things properly.
They may
not use the things they learn on a regular basis, but it is always
helpful to know the correct thing to do so that whatever the future
presents, they won't feel out of place or at a disadvantage.
Let the children help with the baking, making, setting the
table,
lighting the candles (if you choose to use them), etc. Whoever
is
hosting may choose to dress up their table, but in a safe way.
To
accomplish this goal, and make it more child friendly, you may
wish to
do what we have done: we have a dining room table that always
has a lace
tablecloth on it. I covered it in plastic for protection. Plastic
by the
yard is available at Wal-Mart or any fabric store. It comes on
a 60 inch
wide bolt and in varying thicknesses. Then, when we are ready
to have
tea, we set the table, put our candles on (my children love using
candles), get the food ready and sit down for some mother-daughter
time.
We linger as long as we want and make memories for tomorrow. This
is a
tradition I hope to pass onto my grandchildren, if the Lord tarries,
through their mothers. If God is willing, I'll get to share a
cup of tea
over the tea table with my daughters and their children. If you
choose
to have a tea with your daughters, I think you will find it to
be a
treasured time that you and they will want to repeat.
In the English tradition of tea, it is actually a meal. However
elaborate or simply you do your tea, it is best to have something
sweet
and something savory. If all you have is sweet with sweetened
tea, it
gets to be a bit too much. So, have something, (even if it's just
one
thing) to counteract all the sweet things.
Choose your tea (we like Bigelow's English Tea Time or Twining's
Prince
of Wales Tea). Fill the tea kettle with cold water (has more oxygen
and
a better flavor) and set it to boil. Heat the teapot with very
hot tap
water. Let it sit a few minutes, pour out the water and do again.
The
pot should be hot when you pour boiling water into it. This protects
the
ceramic from cracking and also keeps the pot from robbing heat
from the
boiling water, so you have a good hot cup of tea.
Pre-measure your pot to see how many cups it holds. For a seven
cup pot,
four English Tea Time or Prince of Wales tea bags are perfect.
When the
tea kettle has boiled, pour the hot water out of the teapot, put
in the
four tea bags, pour in the boiling water and let steep for five
minutes.
Remove the tea bags, squeezing out gently, so as to not break
the bag
open. Put on the lid, take the pot to the table and set it down
on a
pretty hot pad or tray to the right of "Mother," the
name given at the
tea table to whoever is going to pour. Cover the pot with a tea
cozy to
keep it hot at the table. (This can be purchased or made. It is
an
insulated dome shaped cloth "bell" which slips over
the top and around
the sides of the teapot, or can be one that ties around the pot.)
To make tea with loose tea:
Use one teaspoon per cup and add one for the pot. Proceed as
above
adding loose tea instead of tea bags. Loose tea requires a tea
strainer
to pour through for each cup and/or a tea ball into which you
can put
the loose tea to steep in the teapot and then remove before putting
on
the lid to serve. It is still a good idea to pour through a strainer
to
catch all possible tea leaves in the pot before going into the
cup.
To decaffeinate caffeinated tea:
With tea bags or loose tea in a tea ball, pour a small amount
of boiling
water over the tea until bags or ball are covered. Let sit 30
seconds,
pour off and then proceed as normal.
Serving the tea:
Serve tea with the sweetener of your choice (honey, stevia,
Sucanat with
honey are healthier choices than white sugar), lemon slices or
to serve
as the English do, serve with milk (YUM!). Add just enough milk
to see
it bloom up from the bottom of the cup. When stirred, it should
look
almost like caf� au lait. (coffee with milk) Do not use
cream for tea as
it is too heavy for the delicate tea and masks the flavor.
There are two schools or thought on the etiquette of adding
milk. Some
say to add it as above; others say to add the milk first. In the
"olden
days," tea was precious and expensive. By adding the milk
first, if the
milk was sour, they didn't waste precious tea to find out! When
the hot
tea was poured into the tea cup with milk, the milk curdled right
away
and they threw out the bad milk instead of the precious tea. Another
serving idea is to provide cinnamon sticks for "stirrers"
instead of
teaspoons.
Traditionally, the center-piece of the tea table is flowers,
a cake, or
a trifle, especially for a formal tea. But remember, the most
important
thing is to find your niche and make your tea suit you! It's more
important to have tea and give your children this precious time,
than it
is to make it a fancy affair and feel that it is too much trouble
and
thus, never do it. Make the time to spend in this wonderful way
of
bonding with your children. They are the most important aspect
of having
tea, not the food or fanciness of the tea.
For a fun field trip, take a trip to a tea room and see how
they do it.
You might get some ideas or you might decide that you like the
way you
do it better.
Here are some recipes made with freshly milled wheat to help
you get
started. Feel free to use these or whatever you like for tea.
There is
no right or wrong in today's world; just do what you like and
concentrate on building relationships with your loved ones.
Here are some recipes made with freshly milled wheat to help
you get
started. Feel free to use these or whatever you like for tea.
There is
no right or wrong in today's world; just do what you like and
concentrate on building relationships with your loved ones.
Tea Scones
These are my favorite scones to serve with clotted cream and
jam!
Scones are a sweet biscuit with fruit. For a Valentine's Day
tea, why
not cut them out with heart or teapot shaped cookie cutters?
3 c. hard white flour 1 stick butter, cut into
1/4 "
slices
1 Tbsp. alu. free baking powder 1 c. currants (or raisins)
1 tsp. baking soda 1 c. buttermilk
1/4 tsp. salt 1 egg, beaten
1/8 c. (2 Tbsp.) honey
Combine dry ingredients, cut in butter until resembles course
cornmeal.
Add currants (they're worth finding!). Make well in center and
add
buttermilk and honey. Stir until moistened. Will be a shaggy dry
dough.
Turn onto bare board and knead. Press out with hands to desired
thickness (3/4 - 1 inch). Cut with tea sized or regular biscuit
cutter.
Place on baking sheet sprayed with non-stick spray. Brush with
beaten
eggs. Bake at 400� for
12 - 15 minutes. Split open and serve with clotted cream and jam.
You
may substitute cream cheese (cut into squares like pats of butter)
or
whipped cream for the clotted cream, if you desire.
Almond Raspberry Chocolate Chip Muffins
Almonds, raspberries, chocolate! Three of my all time favorite
flavorings. One day, I decided there just had to be a way to
combine
them into something wonderful. These were the result. They are
also
amazingly good without the raspberries, for which my
husband isn't too fond.
2 1/2 c. hard white flour 3 Tbsp. extra light
olive oil
2/3 c. honey 1 c. milk, b/milk, y'gurt,
v.
yogurt*
4 tsp. alu. free baking powder 1 tsp. vanilla
*(omit
w/v. yogurt)
1/2 tsp. salt 1 1/2 c. fresh/frozen
raspberries**
1/4 tsp. soda (if using yogurt or b'rmilk) OR 3/4 c.
raspberries all fruit spread/rasp. jam
1/4 tsp. grated nutmeg 2/3 - 3/4 c. semisweet
chocolate chips
1/3. c. slivered almonds, optional 1/2 tsp. almond extract
Preheat oven to 400�. Mix all dry ingredients together,
including
chocolate chips. Mix all wet ingredients together. Pour into dry
ingredients. Mix gently so as not to break up the raspberries.
Bake for
15-20 minutes or until a toothpick or cake tester comes out clean.
Makes
12 muffins.
** If using frozen raspberries, rinse and thaw first.
by Mary Steinke
Two memories from childhood stand out in my mind from our annual reunions on the family farm.
First, I remember being locked in an outhouse in the middle of August in 95-degree weather. My second cousin and I had thrown rotten tomatoes at the boys. They retaliated by picking us up, pushing us into the outhouse, blocking the door, and leaving us for "dead."
Second, I remember my Great Aunt Eleanor's mouthwatering, made-from-scratch pies. She was so proud of those pies that she died without giving anyone the recipes.
Obviously, the second memory of the incredible taste of the pies continues to be my favorite reunion memory.
However, the memory of needing to leave the reunion early because I was unfit to sniff lingers still--so to speak.
Overall, family reunions can be a wonderful experience--even when the unexpected happens. The tale of the "Outhouse Outlaws" became legendary in the family.
One summer, God blessed our immediate family with three family reunions. Three different sides of our extended families felt the need to gather together for fun instead of just gathering at family funerals. We wanted to celebrate the awesome gift of family, to laugh together, to share our lives, to relive memories, and to create new ones.
In all three cases, we made our different family reunions as user friendly as possible for everyone. The simpler the better became our battle cry.
If it's been too long since your extended family gathered to enjoy each other's company, you still have time to create an impromptu celebration this summer or begin planning for next year.
The following are 25 tips we found invaluable in planning our family reunions:
1. When choosing a date, avoid summer holiday weekends since parks are harder to reserve, crowds are larger, and traffic tends to increase.
2. Make sure the date does not conflict with an area festival. Otherwise, motel rooms will be hard to find for out-of-towners.
3. Consider including the date of the reunion in your Christmas card. Families often begin planning their summer activities in early January.
4. If the reunion is in the summer, reserve a park shelter early in the spring.
5. Explore the possibility of choosing a date during another season of the year. My sister-in-law's family holds their gathering on Columbus Day weekend.
6. If relatives are scattered throughout the country, consider
picking a great vacation destination like a national park, exciting
city, or amusement park. Use the Internet to locate motels and
places to visit.
7. Wherever you decide to hold the reunion, plan for the physical
needs of relatives using walkers or wheelchairs.
8. E-mail continues to be a great way to communicate information
for those relatives who are on-line.
9. Encourage relatives with desktop publishing skills to create a reunion newsletter just prior to the reunion and a recap edition after the reunion.
10. Invite a relative to create a family tree with a computer program and then share it in the newsletter or at the reunion.
11. Rotate reunion coordinators every year or hold the reunion every 2-4 years.
12. Keep the menu simple. Allow the best cooks to bring their best creations. Allow the non-cooks to bring the drinks.
13. Nametags are a must for a group larger than 25.
14. Specially made reunion T-shirts are great, but permit them to be optional. Remember your Great-Aunt Sarah never wore trousers in her life, let alone a T-shirt.
15. Take a few group photos and include them in the reunion newsletter recap edition.
16. Candid snapshots taken by the preteens or teens with either disposable, instant, or digital cameras give them a chance to become involved without cramping their style.
17. Try an old-fashioned game of kickball. Even preschoolers can kick a ball and run the bases with the help of an adult.
18. Blowing bubbles, watermelon seed spitting contests, and water balloon tosses prove to be easy, improvised games for all ages.
19. Bring old photos for those who prefer to sit and watch the games.
20. Do plan for the possibility of rain. Playing board games under the park shelter may not be ideal, but can prove to be fun with the right attitude.
21. Put out a donation basket for the rental of the shelter, postage for the newsletter and development of the pictures.
22. Everyone has a relative who may rub you the wrong way. Just smile and be polite.
23. Choose another time to talk through family issues. Reunions should be enjoyable and fun--not a time to pick at old wounds.
24. Plan a family worship service thanking God for all the blessings bestowed on the family.
25. If a family member has died since the last reunion or a new baby has been born, thank God for the gift of their life during the blessing of the food or at the worship service.
The ebook by Marilyn Moll, FAST AND HEALTHY RECIPES FOR BUSY WOMEN -Reliable Recipes for Busy Families, includes my best and most requested bread recipes. My earnest desire is that you will find the my tips, information, and recipes to be a reliable resource of healthy, family-favorite recipes, as well as streamlined preparation methods which fit in with busy lifestyles.
Permission is granted for reprinting online articles if the author is identified and the following byline is included:
Copyright Hearts at Home 2005, used with permission. For more
information about Hearts at Home: 309-888-MOMS or www.hearts-at-home.org
As a young girl, I vividly and fondly remember walking into my Grandmother's Depression era kitchen greeted by the tantalizing and unforgetable smells of spicy ginger snap cookies, homemade applesauce, and succulent homemade blueberry pies. Although the smells are my most cherished memories of Grandmother's house, I clearly remember being greeted by a fascinating old woodstove, a relic from her past. Grandmother's kitchen was trimmed in old fashioned oak bead board wall panels (narrow tongue and groove wood panels) and cupboards. Can you imagine, as a child, waking up to the fragrant smell of homemade blueberry muffins baking in the oven to be served hot for breakfast on colorful Fiestaware plates? Although I'm sure I only glimpsed a microcosm of depression style homemaking, I amconvinced the lean times of the Great Depression stimulated ingenuity, industry, resourcefulness and creativity which I believe is a template for modern day families interested in building character through the old fashioned values of homecooking, family relationships, memories of togetherness, and opportunity to live with an eternal perspective. Let's take a look at how a typical home was managed then and what we can learn from our ancestors.
Seventy years ago our nation was embroiled in the midst of what is commonly known as the Great Depression Era. Typically, we think of the 1930's as a time of bank closures, soup kitchens and food lines, door to door begging, widespread unemployment and underemployment, hardships, and family farming devastated by the dust bowl era. Actually, unemployment hovered around 25% with one in four able bodied workers without work. Despite widespread misfortunes, this is an era where people everywhere opened their hearts to anyone in need, and learned to enjoy and appreciate the simple things of life, learning to make do, wear it out, or do without.
My parents recall the depression years as the years BEFORE frozen convenience foods and box mixes, expansive super market selections of fresh fruits and vegetables available out of season, fast food restaurants, television and the internet. Ice, baked goods, milk, and produce were usually delivered to homes by horse drawn carts. Without freezers, families survived long winters through industrious back yard gardening and home canning. Moms baked most of the breads, rolls and pastries themselves and occasionally indulged in "purchased baked goods" which came delivered to their home.
Food, prepared from simple basic ingredients from scratch, kept mom at home spending a good portion of each day preparing the family foods. Common menus included pot roast and gravy, chicken pot pie, macaroni with tomato sauce, potatoes cooked all different ways. Rounding off the meal would be a compliment of home canned vegetables, fruits, jams and jellies. Green salads were seasonally available and fruit was served fresh in season or from canned goods that were preserved during the summer. Desserts often consisted of pie, pudding, and custard. Compare today's meals often picked up on the run or heated in the microwave and consumed in the car or by oneself rather than the family seated around the breakfast and dinner table discussing the events of the day.
With money in short supply in most households, families relied on mom to fashion family clothing.Today's access to discount stores, thrift stores and garage sales were non-existent at that time. Many families depended on mom or grandmom' s needlework skills to sew dresses and shirts from such things as feed and flour sacks since these items were usually sold in floral print cloth sacks. Old and worn clothing was often refashioned into useable clothing for theyounger children by talented home seamstresses . Useable clothing was always handed down to younger siblings or donated to those in need. Indeed they lived by the motto: "Use it Up, wear it out, make it do, or do without".
Clearly, life was difficult. When asked today, however, the then- depression era children often have many fond memories of making their fun without a lot of money. For fun pasttimes, families organized old-fashioned ice cream socials, often held in schools and churches. Other neighborly get-togethers encompassed everything from quilting parties and spelling bees to dances, and weekly musical get-togethers in homes with real instruments including saxophone, trombones, accordians, piano, drums, and guitars. Children thrived on neighborhood ball games, board games, and imaginative play; and contrived doll houses and clubhouses from discarded cartons from the appliance stores. Contrast the old-fashioned games with today's annoying and noisy Nintendo and electronic games that depend more on spending money than imagination.
Going to the movies in the 1930's cost a dime. This was the era of the opulent movie houses furnished in plush red carpets with shiny brass railings, and lavish lighting. Many of the grand old movie theatres housed the mighty Wurlitzer organs that had been made just for movie theatres. Organists would play rousing tunes to excite the crowd and show off the vast sounds and capabilities of the old organ. Following the opening numbers would be the main feature which would transport the patrons to a dream world far from reality for hours. Shirley Temple, Tarzan, and others entertained the crowds during the Saturday afternoon matinees. Contrast the excitement and exhilhiration of attending movies in crowded and extravagant theatres to today's visit to the neighborhood video store followed by movie viewing in the comfort of one's own home.
Some family amusements were seasonal in nature. My parents remember winter time treats of "snow candy". While the children filled pie tins with clean snow, Grandma boiled down the maple syrup until it would pour in a sticky, thread-like stream over the gathered snow for a sweet and sticky treat. My father in law recalls making homemade ice cream in the old hand cranked ice cream crocks anytime of year for entertainment. Cider making during apple harvest from the bruised or wormy apples could be a popular rural community event. Homemade root beer and soda made from commercial syrups, bottled and corked at home made a popular pasttime and tasty beverage.
Other families might spend their free time picking wild huckleberries, blackberries, blueberries and strawberries in season from rural hillsides to make tasty jellies, jams, and drinks to be enjoyed for the rest of the year. Yes, with a little ingenuity, people made themselves many delicious goodies just by using mother nature's gifts and very little cash. Contrast these virtually free events with today's frequent visits to Starbucks and neighborhood ice cream shops which require more cash than diligence and effort.
Children of the depression collected the "Big Little Books", small 3-1/4" by 4 1/4" books which fit into small hands and sold for a dime. Usually filled with 350 or more pages, these little books were the perfect fit and perfect price for children. Favorite titles included comic-strip characters like Little Orphan Annie, Tarzan, Mickey Mouse, and Buck Rogers. Later, as Big Little Books grew more and more popular, titles expanded to include characters from movies, radio and literature such as Tom Mix, the Lone Ranger, The Three Musketeers, Will Rogers, Shirley Temple and even Shakespeare's Mid Summer's Night Dream. Yes, those books held a special place in the hearts and minds of kids trying to build their own little familiy library as well as adding an exciting element of adventure into their young lives. Found on the shelves of antique stores today, these kid-size books opened up new worlds to young readers and bring back fond memories to those who grew up with "Big Little Books". How many homeschool families do you know who aren't still painstakenly collecting literature classics rather than indulging on pop literature such as Harry Potter, and other choices consisting of dubious morality, and challenge to adult authority?
Radio drama theatre serial programs amused families who had finished their chores and the evening meal to gather around the radio to listen to their favorite programs. Radio programming often greeted the new day with religious devotionals followed by a schedule of breakfast club variety shows, moving on to more music and talk hosted by Arthur Godfrey. Afternoon radio shows events included old time soap operas, just as television does today. The depression is remembered for popular children's programs such as The Lone Ranger, Captain Tim Healy Stamp Club of the Air, and others. Contrast families gathered around the radio with today's children hooked into a walkman or an MP3 or watching MTV to listen to the popular music of today produced by rock stars with lifestyles we can only pray our children choose not to emulate.
Yes, the Depression years posed an extended time where people learned to live with hardships, simple home cooked meals, uncertainties, and living without. Most Americans say they never want to see the Depression years return. Compare Depression era living with today's lifestyle of busy schedules dominated by soccer leagues, convenience and fast foods, ready made clothing, consumer debt, life dependent on the internet, and other extravagances and indulgences! Given the choice, my preference is to rely on the old-fashioned merits of home cooked meals served around the dinner table, gratefulness for what I do have, and home centered values and family activities such as reading, hiking, gardening, and attending church and community activites. Whether your family is currently prospering, unemployed, or struggling to make ends meet today, I hope you and your kin will not only be inspired by those who had everything but money and consider what part of "depression style living" belongs to your family's lifestyle and ambitions.
Copyright, 2004, The Old Schoolhouse Magazine. www.TheHomeschoolMagazine.com
You may subscribe to the The Old Schoolhouse $37.00 for a two year subscription. If you would like to review a complimentary copy of the Magazine, please contact me at marilyn@urbanhomemaker.com or call at 1-800-552-7323.
by Susan Dahlem
What is Saponification???
**Saponification - a reaction in which an ester is heated with
an alkali,
such as sodium hydroxide, producing a free alcohol and an acid
salt,
especially alkaline hydrolysis from a fat or an oil to make soap.
When an acid (fats, oils) and a base (sodium hydroxide) react
together and
neutralize into salt, the product is called soap. The method
you will learn
about in this tutorial is cold process soapmaking. It is a very
simple way
to accomplish something magnificent!! There are many other ways
to make soap
but non has called to me like this old fashioned method. So
read on and
soon you will be ready to make soap too!!
What do I need to make soap?
Gather all equipment and ingredients ahead of time. READ
ALL INSTRUCTIONS
BEFORE BEGINNING. If you have any questions feel free to email
me at
thesoapmaven@cp-tel.net
Enamelware pot or stainless steel pot. - NEVER USE ALUMINUM
A good quality scale that measures in tenths of ounces -
I use a digital
postal scale that measures up to 10#
One wide mouth glass measuring cup or pitcher
At least two spoons - stainless or high heat plastic
Small stainless or glass container for measuring sodium hydroxide (lye)
One small stainless steel wire whisk.
Quick read thermometer that registers 80-200degrees
a pair of well fitting rubber gloves
safety goggles
a mold suitable for your size batch of soap - can be plastic,
glass or wood
- lined with freezer paper or greased with shortening
Old Towel
Basic Soap Recipe Ingredients - this is a good recipe to start with...simple ingredients, good quick trace
8 ounces palm kernel oil
4 ounces coconut oil
6 ounces olive oil
2.7 ounces of sodium hydroxide dissolved in 6 ounces of distilled
or rain
water.
You may scent this size batch with up to 1 ounces essential
or fragrance oil
at trace.
Now you have all your supplies you are ready to MAKE SOAP!!!
Allow yourself 1 1/2 hours for making a batch of soap - and
use extreme
caution! Sodium Hydroxide is a very dangerous substance AND so
is your raw
soap.
Prepare your mold ahead of time. Spread out an old towel.
You will wrap
your soap in the towel after pouring and covering with plastic
wrap.
Use safety goggles and rubber gloves from the time you start
until you are
finished cleaning up after your soapmaking. Always keep lye,
lye water and
raw soap out of reach of children and pets. Lye is caustic in
both dry and
wet form and will burn your skin, can blind you and will ruin
just about any
painted surface or linoleum floor. So BE CAREFUL! Now that all
of that is
out of the way...let's make some soap!!!
In your glass measuring cup with a spout or glass wide mouth
jar, put
measured amount of cold water. NEVER POUR LYE INTO WARM WATER-
IT WILL
CREATE A VOLCANO! Stir in lye until all is dissolved - DO NOT
INHALE FUMES.
Set aside in a safe place to cool down to about 100 degrees.
Check it often
In the meantime, over low heat melt your solid oils in a stainless
or
enamelware pot that will accommodate both the oils and water when
mixed.
When they are melted, remove from heat and add olive oil. Check
your
temperature on the oil and keep a watch - both lye water and oils
need to be
about 100 degrees. You may need to give one or the other a hot
water or
cold water bath to bring them to the right temps. Water baths
are simple..
just put either cold water or hot water in one side of your sink
and sit
container of either lye water or oils in it till it reaches desired
temp.
This takes a little practice but works well.
When both lye water and oils are around 100 degrees you will
now mix the two
Pour the lye water in a steady slow stream into the oils, stirring
constantly and consistently in a circular the circle 8 pattern,
alternating
between the two. This will cause saponification**. YEAH!!!
Continue to stir, noting the changes in your mixture. It will
eventually
become slightly thicker and more creamy looking. Continue to stir
until the
mixture traces...this is when your mixture is think enough to
support a drop
or dribble of it on its surface. It should be the consistence
of thin
pudding. This can take 30 minutes to an hour or more. This is
the point to
add your fragrance and/or additives (lavender buds, French green
clay are
just suggestions*) if desired. If making plain soap - pour into
prepared
mold.
After pouring your soap, cover with plastic wrap and then
wrap the towel
over and back again until it covers the mold well. This is to
insulate the
soap and allows it to continue saponification at a constant temperature
and
will keep it from cooling too quickly which might prevent your
soap from
getting hard enough.
After 18-24 hours, unmold the soap and remove any plastic
wrap that might be
clinging to the soap. Let the soap sit another 12-24 hours before
cutting
into bars. Stack the bars as to allow air to circulate around
them and let
them cure for 4-6 weeks or more. You may even leave your soap
in a log and
cut off as you need it.
*If you use botanicals or clays, it is best to put a little
mixture into a
bowl, mix in the additive and then pour and stir it back in the
batch.
Mixing well.
Susan Dahlem is AKA TheSoapMaven has been making soap for many years and is available to answer your questions. Her wonderful homemade soap is available at her website.
You may learn more at her website: www.thesoapmaven.com
Or you may contact her privately at: thesoapmaven@cp-tel.net
We, at The Urban Homemaker, don't advocate complicated or expensive holiday celebrations, and wish to encourage your family to focus on the true meaning of the holiday season.
However, this twelve-week simplified timetable could be used as a checklist and is designed to be flexible in order to assist you in focusing in on your family's priorities for Thanksgiving, Christmas. We believe holiday planning promotes order and harmony, offerring you time to evaluate what is really important to your family.
Remember, the timetable is merely a suggestion; rearrange, add, or delete activities from the schedule to meet the needs of your family.
Sheri Graham wrote The 12 Week Holiday Planner for The Christian Family So you Can Keep Your Focus on Jesus for the Holiday Season based on my Holiday Timetable!
If you would like to preview Sheri's ebook before purchasing it please Click Here
Sheri says, "My desire in putting together this eBook is to provide a tangible way for you to plan out your holidays so they are enjoyable, less stressful, and more filled with the things that really matter."
Week #1 - List Week Oct 3- 8
Make your lists of gift recipients, Christmas cards, menus for Thanksgiving, Christmas, and New Year's, goodies to share or to give, favorite meals to prepare ahead, decorations needed, gifts to make.
Week #2 - Browse Week Oct 10-16
Develop and record ideas for gifts, decorations. Ask yourself the following questions:
* What would our ideal Christmas be like?
* What activities are particularly important to our family at Christmas?
* How much emphasis do our Christmas activities place on the spiritual side of Christmas?
Week #3 - Supplies Week Oct 17-23
After inventorying supplies on hand, purchase non-perishables needed for holiday baking, and supplies needed for gift making,, gift wrapping, etc.
Week #4 - Baking Week: Oct 24-30
Set aside the time needed to complete holiday goodie making. Make lists of toys, books, and clothes that children would enjoy. More...
Week #5 - Gift Making Week Oct 31 - Nov 6
Focus your energies on completing gifts to be made. More...
Week #6 - Shopping Week #1 Nov 7-13
Decorate your home for Thanksgiving and focus on gift buying for prepared list. Wrap and label packages as you go. More...
Week #7 -Shopping Week #2 Nov 14-20
Complete as much shopping as possible. Take advantage of many items that are on sale before Thanksgiving! More...
Week #8 - Thanksgiving Week Nov 21-27
Use this week to prepare Thanksgiving dishes, pies, homemade rolls, and enjoy the holiday with your family. Marilyn's Traditional Thanksgiving Stress Free Plans and Easy Recipes for Busy Moms are at this link.
Week #9 - Mailing Week Nov 28-Dec 4
Complete package wrapping for gifts to be shipped...More.
Week #10 - Meal Making and Decorating WeekDec 5 -11
Prepare some favorite meals and other baked goods for the hectic days ahead. Decorate. Involve children in memory making! My recipes for Beef Burgundy and Honey Glazed Chicken and other reliable family favorites can be downloaded at this link.
Week #11 - Final Shopping/Wrapping Week Dec 12-18
Complete last minute details and enjoy holiday parties, concerts, and family activities. For quick and easy cookie recipes Click Here.
Week #12 - Enjoy Your Christmas Celebration Week Dec 19 - 25
Enjoy the Holidays with Family and Friends! Take time to drive the neighborhoods to enjoy holiday lighting displays. Enjoy family traditions and special meals. A complete holiday menu with delicious recipes is found at this link.
Some of information included in The 12 Week Holiday Planner for The Christian Family book:
*Detailed ideas of what to do weekly for 12 Weeks
*"Sheri's Tips"- tips to make your holidays meaningful
*Christmas Craft and Gift Ideas
*Memory Making Ideas for the Family
*Ideas for Baked Items to Share/Give Away
*Ideas for Meals to Freeze for Use during the busy weeks
*Decoration Ideas
*Supplies to stock up on ahead of time or when on sale
*Ideas for a Holiday Baking Schedule
*Kids' Gift Idea List
PLUS!!! "The Glorious Coming: A Jesse Tree Celebration of Advent" - Jesse Tree devotionals
If you would like to get more ideas of how to focus on Jesus as the reason for the season be sure to join our discussion!
The below article is excerpted from Treasury of Vintage Homekeeping Skills by Martha Greene
Several months ago, I read a post on an online discussion group. In the post, Lin Carzares was reminiscing about her grandmother's homekeeping notebook. Lin said, in part, "My grandmother scheduled every facet of her housekeeping and considered it an actual occupation, it was her calling in life, and it showed in how meticulous she was with her notebook. It was a hard-bound book, about 5" x 8" and about an inch thick. She made detailed diagrams and sketches to illustrate her ideas. How I wish I had that notebook - I could learn a lot from her!"
Instantly, my mind went back to my own grandmother's Depression-era
kitchen. I have fond, vivid memories of walking into her kitchen, my
youthful senses immediately awash in the tantalizing smells of spicy
gingersnap cookies, homemade applesauce, and succulent blueberry pie.
Imagine the glory of a childhood in which one awakens to the smell of
baking blueberry muffins, waiting to be served hot for breakfast upon
colorful, Fiestaware plates.
My friend, Martha Greene, read the same post by Lin Cazaras. She was
immediately inspired to create a vintage-flavored notebook on homekeeping
skills one that could be used by mothers today to pass on to their
children. Martha consulted with me and other like-minded homekeepers,
and she has compiled an incredibly useful and warm treasury of
information for the homekeeper. The Treasury of Vintage Homekeeping
Skills is truly a book whose time has come � again!
The Treasury represents a remarkable union of practical and useful
information, thought-provoking and timeless quotations, delightful
vintage graphics, and a wide variety of delicious recipes for all
occasions. With the help of several contributors, the finished product
covers such subjects as old-time medicinal home remedies, patterns for
handiwork, outlines and ideas for gardening, instruction on baking and
cooking, and a section on home business.
The Treasury of Vintage Homekeeping Skills is a loving and practical way for mothers today to pass on their homekeeping skills to their daughters and granddaughters. It encourages us to press on in the honorable profession of homemaking. This book deserves a place in every hope chest; a space on each woman's shelf who truly has a heart's desire to be a wife and mother. It is a work deserving of being preserved and passedon for many, many years to come. Order Item #6119 $29.95
Orders of $100 in assorted products or more this book may be purchased for only $15.95 (upon request)
Orders of $200 assorted products or more this book may be purchased for FREE (upon request) Use the comments section of check out to let us know you would like this item.
If you haven't tried my blue ribbon winning Marilyn's Famous Whole Wheat Bread Recipe, here is the link to the recipe.
Complimentary copies of our 64 page catalog of products for homemakers is available here.
Teaching Lost Arts by Rebekah Wilson
Although it was once necessary to know and use many of the "old fashioned skills" in order to produce what a family needed and used, with modern convenience's today and the ability to purchase almost any item we desire, there is no longer a pressing need to teach young hands the older skills. Yet � have we gained from this loss? What skills have replaced the traditional ones? Most young people today spend their time unwisely and waste their formative years never learning how to use their hands to benefit themselves or others.
"There is a charm in occupation which can scarcely be understood by idle persons, nor does the enjoyment end when the time has been whiled away; for the permanent results remain in the comfort or gratification we are enabled to give to those around us."
E. Davidson, 1874 from The Boy Joiner and Model Maker
This is an excellent point from one who knew the importance of working with his hands. Whether sewing or woodworking, cooking or gardening, knitting or whittling these and many more of the lost arts deserve to be brought back and encouraged in the younger generation. Parents who are willing to learn side-by-side with their children will pass on not only a legacy and enjoyment of working with their hands, but also many precious memories that never would have been made without the impetus of learning a new skill.
"And that ye study to be quiet, and to do your own business, and to work with your own hands, as we commanded you; That ye may walk honestly toward them that are without, and that ye may have lack of nothing." 1 Thessalonians 4: 11-12, KJV
The Bible has many many verses that speak of working with your hands for the benefit of others and ourselves. The Virtuous Woman found in Proverbs 31 is highly praised because she "worketh with her hands" and benefitted not only herself, her husband, her family and servants, but all those around her. She is a shining example of diligence, industry, perserverance, fortitude, forethought, and many other wonderful characteristics. But the most important characteristic she displays is her joy at working hard and doing many tasks with her own hands. She "eateth not the bread of idleness" that is so rampant in our modern day. How many children are being raised who have truly found the joy in working industriously with their own hands? And how do we teach this joy for working with our hands?
First we need to discern the different levels of "work." There is the boring more mundane work such as cleaning toilets, washing dishes, scrubbing floors and folding laundry. These are important and need to be taught as it builds responsibility and reliability, but you will not find the same joy in cleaning toilets as there will be in baking bread or embroidering a pillowcase. Some work is basic duty like cleaning the home, whereas baking, cooking, sewing and other types of work are more enjoyable because we are creating and putting a part of ourselves into our work. The important aspect is finding joy in finishing the mundane, which allows us time to work on the enjoyable.
And yet, the secret is, it's ALL work to some extent or another. Children who are able to get into a routine habit of always being busy, industrious and keeping their hands busy will mirror the Virtuous Woman so highly prized in Proverbs 31. Embroidery, bread baking or another fun and enjoyable skill can be and is work, yet using them as a reward instead of allowing a child to watch television, play video games or other worthless pasttimes will help build their character and truly "reward" them for the mundane tasks they perform.
Having basic skills taught while young allows our children to have a wide variety of knowledge to use throughout their lifetime � this is a hidden gift we give to our children that blesses not only our children , but all those they come in contact with.
Because we were created in the image of God, we have the ability to create; to bring into being something that was not there before. God truly must enjoy the process of creating as He has made some of the most unique, interesting and intricate things that fill our world. We have the God-given ability to enjoy His wonders and marvel at His creative genius. But He has also given us the desire and urge to be creative in our own heart and mind. The desire to create is strong in all of us and gives us an outlet for expressing ourselves, which is important for true happiness and usefulness. It doesn't do anyone any good to have fantastic ideas if they can not express them!
In the past children were taught the skills needed to provide their family and future family with most of what the family would use or need. But these skills also allowed the children to express their creativity and find joy and pride in creating something worthwhile or pleasing � and to even earn extra income if needed. Today's children have not been given this hidden gift and have idle hands and little enjoyment of the accomplishment of others. For example, you can not truly appreciate an intricate painting if you have not attempted to paint yourself. As a homeschooler, I have found that teaching something to my children and then taking them to see a master's work often helps them understand the depth of skill and the effort and endurance it took to create it. Whether it is woodworking, sewing, gardening, canning, or a wide assortment of other skills � it is worth the effort of teaching it so our children learn and also gain enjoyment from another's work.
Basic hands-on skills are something every child should know. A knowledge of hand sewing is an almost indispensable skill for the home. And the best way for a girl (or mother) to learn to use a needle and thread is by starting on small embroidery projects that teach simple handsewing stitches. These are quickly completed and the reward of a beautiful hand made item will inspire yet more interest in sewing.
Copyright, 2005. Used with permission. The Old Schoolhouse Magazine.
www.TheHomeschoolMagazine.com
Beattitudes for a Housewife
by Mary Mae Oesch
Blessed is she whose daily tasks are a labor of love; for her
willing hands
and happy heart translate duty into privilege, and her labor becomes
a
service to God and all mankind.
Blessed is she who opens the door to welcome both stranger
and well-loved
friend; for gracious hospitality is a test of brotherly love.
Blessed is she who mends stockings and toys and broken hearts;
for her
understanding is a balm to humanity.
Blessed is she who scours and scrubs; for well she knows that
cleanliness is
one expression of godliness.
Blessed is she whom children love; for the love of a child
is more to be
valued than fortune or fame.
Blessed is she who sings at her work; for music lightens the
heaviest load
and brightens the dullest chore.
Blessed is she who dusts away doubt and fear and sweeps out
the cobwebs of
confusion; for her faith will triumph over all adversity.
Blessed is she who serves laughter and smiles with every meal;
for her
buoyancy of spirit is an aid to mental and physical digestion.
Blessed is she who preserves the sanctity of the home; for
hers is a sacred
trust that crowns her with dignity.
About a week ago, a customer called wanting to know what books
I had that would help girls prepare sewn items their hopechests.
When she received the book, Hope Chest Legacy, she was SO thrilled
with the contents of this book that she called us to tell me what
a terrific book it is.
I asked Ruth to elaborate on HOPE
CHEST LEGACY from a customer's viewpoint, here are her comments:
"For several years, I've been amazed at the lack of basic homemaking skills in many young ladies and young mothers all around me. In an attempt to be a part of the solution, I held several sewing classes in my home, teaching young ladies sewing, embroidery stitches, and how to use a sewing machine, in the hopes that they will pass the skills on to the next generation.
More recently, I invited several of my daughter's friends to my home to not only socialize every other week, but to do something productive at the same time, developing skills while preparing for the future. We decided to form The Hope Chest Society. We are working on items that can be put in each of the young ladies' hope chests. We wanted a few more ideas for what activities we needed to include and that's when I discovered Rebekah Wilson's book, "The Hope Chest."
This 370-page book was exactly what I was looking for. It is full of information and ideas, some that I'd thought of already, and many others that inspired me to do more with not only my own daughter, but with other girls whose lives I could influence.
If you have desired to do something special for and with your daughter that will last a lifetime, this book will give you a clear guide on how to do it, yet give you the flexibility to customize it for your own family. It's an absolutely wonderful book!
Ruth also sent me a PS to her note saying:
"I have six girls in my group. One of my friends loved the idea and now has eight girls in her group. Another friend is desiring to begin a group with her girls and their friends. The hope chest idea is spreading in our area and the mothers are rallying around the girls, ready to teach the skills they have. I never cease to be amazed at how God can take a little seed (idea) and make it grow for His glory!
My family and I have been so blessed by Hope Chest Legacy that I wanted to update readers with author, Rebekah's vision, for future HOPE CHEST SERIES Books.
The dream of Hope Chest Legacy started in 1999 when Rebekah Wilson saw an advertisement for hope chests that reflected only a materialistic aspect. Rebekah realized many people consider a hope chest as only a physical box to hold items until marriage, and then the chest is forgotten. Knowing firsthand what a treasure and blessing a hope chest should and can be, Rebekah and her husband Edward started Hope Chest Legacy to encourage and bless families worldwide. It is the vision of Hope Chest Legacy to teach, encourage, instill and delight families as they go back to their roots - as far back as Biblical days - and begin setting up a hope chest for their children.
Although the materialistic thought regarding hope chests is accurate to some extent, it is only semi-complete. The reality is that a hope chest is timeless. Each chest is unique and reflects the heart of the owner. A hope chest may begin by holding items for a future home, but over the years each chest also finds fond memories, family heirlooms, childhood treasures, and dreams of the future carefully tucked away - whether those dreams are from a young girl preparing for marriage and motherhood, or whether they are from a mother or grandmother who would like to preserve a legacy for their grandchildren and great-grandchildren.
Rebekah has written several books about how to begin a hope chest. She believes a gentle and easy approach should be taken regarding the hope chest and any skills that can or should be learned to enhance the chest and the person themselves. Rebekah has written "The Hope Chest: A Legacy of Love" and is currently writing a 12 book children's series for girls entitled "GRANDMOTHER'S HOPE CHEST".
The first book in this series is currently in print and shows a young girl how to get started with her hand sewing. Beautifully color illustrated instructions (by a homeschooled girl) are included in this book for the Red Rooster Potholder project. This book makes a terrific read and first sewing project for girls aged 3-10. Even if you are not handy with a needle and thread yourself, the instructions will enable mom to help. This is the link to the Grandmother's book:
The below picture shows THE RUNNING ROOSTER the first project in the Grandmother's Hope Chest books.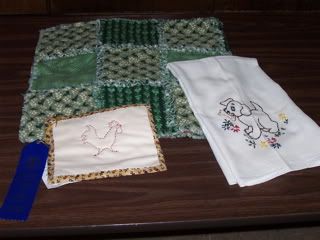
Hope Chest Legacy' WEBSITE offers Antique embroidery patterns , beautiful recipe cards and boxes, kits to complement the Grandmother's book series, information on building a physical hope chest, heirloom recipes, handsewing skills, free online patterns, and lots of encouragement and delight!
The Wilson's have only just begun and their vision includes plans to have many more unique and special items available for hope chests and families, including hope chest kits, a handsewing lesson book, linens and sewing supplies, woodworking projects and a woodworking lesson book for boy,s among a variety of rare, unusual and practical items that will become available next year.
With Christmas around the corner, may I encourage you to invest in this book and the vision of a Hope Chest?
If there's one thing I know, it's that young ladies and mothers enjoy getting together and socializing. I've seen it again and again. I'd like to see something else happening, though; I'd like to see young ladies and mothers getting together, socializing AND doing something productive at the same time. That something productive will be rewarding to both mother and daughter; to the mother because she's planning for her daughter's future, and to the daughter, who is thinking beyond the present to what God has in store for her in the future in terms of a husband, home and children.
When I first began teaching sewing classes, it was out of necessity because the girls I was working with needed the skills, but didn't have them. Then I invited more girls over to my home in order for my daughter to have some friends to socialize with AND to promote the idea that they could actually prepare items for their own personal use in the future. The girls got together, talked over the events of the day and things that were important to them, AND kept their hands busy at the same time. They had something to show for all that time together, they motivated each other to complete their projects, and they came up with new ideas for projects that were unique to them.
When I taught mothers and daughters together, the mothers were thrilled to be learning new skills or refreshing their memories of long-forgotten ones, their daughters learned new skills, and both mothers and daughters were able to work on projects together that were going to be of long-term importance. When the girls are older and ready to start their own homes, they will remember all the time they spent with "Mom," working on projects that they are now using for their own families. What a way to build memories of a lifetime!
As I've said to my friends before, all of us are so busy we don't HAVE time to do much of anything extra, but when it comes to the priorities of life, we will have to MAKE time to do what's important. I would encourage you to not only begin working on handsewing skills and projects with your daughters, preparing items for her hope chest, but make time to get together with other mothers and daughters and do what Timothy tells us in God's word: "Spur one another on to good works." It will be time well-spent!
Here's what a few Hope Chest Society members have to say:
Being a part of Hope Chest Society was such a wonderful experience for me and my daughters. We enjoyed spending time with other families as we learned to sew, knit and crochet. What a blessing it is for me to see my 15 year old spending her spare time crocheting a hat or knitting a scarf (instead of watching TV) and my 6 year old pick up a needle, thread it, and begin to sew something! Our family has been blessed by the many wonderful handmade items that have been given as gifts because of the new skills the girls have learned! Hope Chest has made us all realize how special that home-made touch is in a home.
Carla A. (Mandeville, Louisiana)
Being part of the Hope Chest Society was truly a blessing.
We learned many useful skills which we might not have acquired
otherwise. I was amazed to see that my 6 year old daughter was
able to hand sew, crochet, and even knit. We made rag dolls, including
its clothes. She is currently working on a quilt square. I would
like to encourage all mothers and daughters to become members
of the Hope Chest Society. It will be a time of bonding and fellowship
with other families.
Marsha P. (Covington, LA)
For more information about starting a
Hope Chest Society, please visit Ruth at The Hope Chest Society
or email her at: rsundeen@bellsouth.net.
Simple Wreath Making Instructions
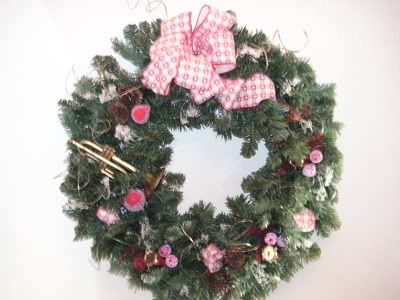
Directions for Making a Wreath
Step by Step Instructions
by Sandy Tuin
Materials Needed
Pine Wreath base - artificial or real
Pine cones (can spray gold or silver if desired), optional
Holiday picks with berries, fruit, drums, silk poinsettia, other seasonal items
Cinnamon Sticks - glue three together
Rose Hips
Filler
1. Fluff wreath by bending stems up and out.
2. Make a hanger if there is not one on the wreath form already by
looping narrow wire in a small circle on the back of the wreath.
3.Make Bow and attach. You will need approximately 10 feet of ribbon for one bow. Wired ribbon
is the easiest to fluff up and arrange nicely.
4. Arrange decorations as desired keeping in mind that the rule of thumb is an odd number of the same type of decoration such as 3, 5, 7, etc.
5. I usually place decorations on the wreath and play with it until I find what I like.
Then, hot glue the items on the wreath.
6. Optional: Place small amount of filler such as baby's breath or other dried material
as desired.
TIP: When placing the items in the wreath they will look better if you will place them down inside the branches, rather than just laying them on top.
Serving Others From our Kitchen
Ed Note: Lisa has a very important message to encourage moms in their high calling as homemakers.
The phone call comes from your church ministry coordinator; a meal is needed for a family in which the mom just had emergency surgery. Your heart wants to serve this family, but if you do, your own family will suffer with no meal. Your frustration and defeat well up inside as you say, “I am so sorry, but I won’t be able to help out…again.” You hang up the phone feeling so guilty. You want to obey God and serve others, but how? How can you serve without your family “suffering”? You know that Proverbs 31:16 says (from the Amplified Bible) “…[and not courting neglect of her present duties by assuming other duties].” This is a real problem faced by real women everyday. The answer, as they say, is to “Work smarter… not harder”!
What you need is a freezer full of meals! There are so many ways to accomplish this. Ephesians 5:16 says, “Making the very most of the time [buying up each opportunity]…” Here are some opportunities to make the most of your time!
1. When you make a family meal, multiply it by two, three, or four times to make extras, to put into your freezer for a later time.
2. Take a little time to make huge pots of soup, multiple soups, or stew. Let them simmer on the stove all day. Cool them by pouring them into smaller family-size containers. Make sure to label them and leave a little room on the top for the liquid to expand when frozen.
3. Take a day and assemble your family’s five favorite meals. Be sure to make at least two of each (a little more work for even greater benefits)! A couple of days before, get a vote from your family on their favorite meals, make a grocery list, and go shopping. On cooking day, get the kids together and assemble your meals. Be sure to wrap the finished meals well and also use gallon size zipper-type bags so that you can fit more meals into your freezer as they freeze flat. Don’t forget to label with a permanent pen the name of the meal and any special directions for cooking or reheating.
4. Call up a few friends to see if they will do a Meal Swap. Each person picks a recipe and makes enough meals for each person participating. Don’t forget to make at least one, if not two, meals for your own family! There really isn’t too much extra work in making a few more meals when you are cooking anyway. Again, be sure to label the meal and add any special instructions.
5. Do the same as above, but do a Soup Swap. This is especially wonderful for autumn and wintertime!
6. For a little more work and planning, but for a HUGE return, do bulk cooking with friends (also called “Grande Cooking”)! Get together with girlfriends and assemble 10-15 different recipes on one day. You go home with 20-40 meals to put into your freezer that will last for a couple of months! You will save a ton of money, have a full freezer, and experience a great and much needed time with some friends, and you don’t have to worry about cooking dinner every night again!
(For step by step instructions, go to www.GrandeCooking.com.)
These are just a few simple ideas, and with a little planning you will be able to minister to others, including your own family! Also, be sure to have your children participate in the ministry process by helping prepare the meals. “She tastes and sees that her gain from work [with and for God] is good.” (Proverbs 31:18)
Now when the phone rings, as Proverbs 31:20 says, “…she reaches out her filled hands to the needy,” and you are “…rendering service readily with goodwill as to the Lord…” (Ephesians 6:7). The guilt and frustration are gone, your family IS first, and meals are in the freezer for ministering. Go and be fruitful with your hands!
Ed Note:
Lisa's book Grande Cooking has been a huge blessing to many busy moms with information how she and her friends together get hundreds
of meals ready in one day of cooking.
Lessons from the Refiner's Fire
by Pete Dunn
Ed Note: While picking up grain at our Denver grain sale in April, customer Pete Dunn felt led of the Holy Spirit to give me the following paper, Lessons from the Refiner's Fire, the day before my late husband Duane passed away. It is reprinted here by permission. Marilyn Moll
For You, O God, have tested us; You have refined us as silver is refined…We went through fire and through water; but You brought us out to rich fulfillment. Psalm 66:10,12
These are some lessons that have come from our walk through the Refiner’s Fire with my 20-year-old son, Andy, since he was diagnosed with an aggressive lymphoma on March 13, 2008 AD.
1. Life is frail; it hangs in the balance like a passing vapor.
Whereas you do not know what will happen tomorrow. For what is your life? It is even a vapor that appears for a little time and then vanishes away. James 4:14 (Job 7:7, Psalm 39:5)
2. The Lord does not serve you anything more than you can handle. He prepares the hearts of those who are to receive.
Eye has not seen, nor ear heard, nor have entered into the heart of man the things which God has prepared for those who love Him. 1 Corinthians 2:9 (Isaiah 64:4)
3. Through the Refiner’s Fire, you come to experience the love and intimacy of God in a new way!
My son, do not despise the chastening of the Lord…for whom the Lord loves He chastens.
Hebrews 12:5,6 (Proverbs 3:11,12)
That I may know Him and the power of His resurrection, and the fellowship of His sufferings, being conformed to His death. Philippians 3:10
4. Through the Refiner’s Fire, you learn to prioritize; the dross and waste floats to the surface…
Yet indeed I count all things loss for the excellence of the knowledge of Christ Jesus my Lord, for whom I have suffered the loss of all things, and count them as rubbish, that I may gain Christ. Philippians 3:8
5. Through the Refiner’s Fire, you learn to treasure greatly family, friends, and saints.
I thank God…as without ceasing I remember you in my prayers night and day, greatly desiring to see you… 2 Timothy 1:3,4
6. Once you are in the Refiner’s Fire, you can’t ask “What if...?” or “Why didn’t I...?”.
Brethren, I do not count myself as having laid hold of it yet; but one thing I do, forgetting those things which are behind and reaching forward to those things which are ahead, I press toward the goal for the prize of the upward call of God in Christ Jesus. Philippians 3:13,14
7. Through the Refiner’s Fire, the Gospel of Jesus Christ becomes very real; apart from it there is no hope!
For I delivered to you first of all that which I also received: that Christ died for our sins according to the Scriptures, and that He was buried, and that He rose again the third day according to the Scriptures. 1 Corinthians 15:3,4
Pete Dunn
Petros2002@earthlink.net
Powered by KnowledgeBuilder