CANNING AND PRESERVING - Apples
Whether you can, freeze, dry apples or all three, a quick review of the methods is in order. You will find that you will save hours of preparation time if you invest in any of the following equipment: The apple peeler , the Villa Ware Food Strainer, and the Nutri-Steamer by Back to Basics.
Don't forget to involve the children, take pictures, and build memories and traditions!!!
The Busy Person's Guide to Preserving Food
Easy Step-by-step Instructions for Freezing, Drying, and Canning By Janet Chadwick
REPRINTED BY PERMISSION FROM STOREY PUBLICATIONS
Apples store well in a root cellar and dry beautifully. Applesauce is a staple in most households, and homemade applesauce is far superior to commercial products. Homemade applesauce can be canned or frozen. Finally apples make great jams and jellies. The natural pectin in apples make them easy to handle in jams and jellies--they can even be combined with other low-pectin fruits to make a firmer jelly.
FREEZING APPLESAUCE
Fastest Method for Applesauce, Good Finished Product
1. Wash and quarter apples. Don't peel. Put in heavy-bottomed kettle with 2 inches of water. Cover and cook until soft, stirring occasionally to prevent scorching.
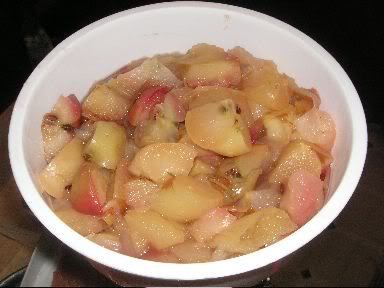
2. Pass through a Hand Crank Food Mill or Food Strainer. Add sweetener to taste, if desired.
3. Cool prepared applesauce and pack into rigid containers leaving 1/2 inch headspace for pints, 1 inch for quarts.
CANNING APPLESAUCE
Even though it takes time to make applesauce, it yields such a wonderful finished product that you may find it well worth your time. Figure that 21 pounds of apples will yield a canner load of 7 quarts of applesauce.
1. Wash and quarter apples. Don't peel. Put in heavy-bottomed kettle with 2 inches of water. Cover and cook until soft, stirring occasionally to prevent scorching. Begin preheating water in canner and tea kettle and preparing jars and lids.
2. Pass through a Hand Crank Food Mill or Food Strainer Add sweetener to taste, if desired. Reheat to boiling.
3. Pack hot applesauce in hot clean jars, leaving 1/2 inch headspace. Process pints in water bath canner for 15 minutes, quarts for 20 minutes.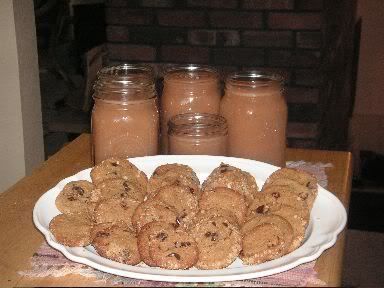
DRYING APPLES- Great for snacks or pies.
1. Wash and core apples; peeling is optional. Cut in wedges, then in 1/4 inch slices; or cut in 1/4 inch crosswise rings. (ed. note: I prefer using the apple peeler to save oodles of time.)
2. Pre-treat if drying in the sun. Pretreating is optional with oven-drying and not necessary at all if you work quickly and slice directly onto dehydrator trays. To pretreat, dip slices in ascorbic acid or commercial fruit dip (page 85), then soak for 1 hour in diluted lemon juice (1/4 cup lemon juice to 4 cups water) or full-strength pineapple juice.
3. Dry in a dehydrator or in a conventional oven at 115 degrees F for 6-8 hours, stirring or turning the fruit once. After the first 6 hours, test for dryness every 2 hours, until there is not moisture in the center when a slice is bitten. Or dry in the sun for 2-3 days, until leathery and chewy, with no sign of crispness in the centers. Take trays inside at night.
4. Cool and package in airtight containers.
For information about dehydrators, Click Here.
MAKING APPLE FRUIT LEATHER
A favorite!
1. Core and cut up 4 medium-size apples, without peeling. Add 1/2 cup water, and cook over medium heat for 15 to 20 minutes, or until tender. Force through a sieve or use a blender and stir in 1/4 cup honey or to taste.
2. Line a drying tray with plastic wrap (or use the fruit leather sheet that came with your dehydrator). Spread the puree 1/8 inch thick on the trays.
3. Dry in a dehydrator at 120 degrees F for 6-8 hours, or until leather can be pulled easily from plastic. Invert, pull off plastic, and continue drying for another 4 to 6 hours. Dry in the oven at 120 degrees F for 6-8 hours or until leather can be pulled easily from plastic. Invert, pull off plastic, and continue drying for another 6-8 hours. Dry in the sun for 1 day, or until leather can be pulled easily from plastic. Invert, pull off plastic, and dry for 1 more day.
4. To store, roll up in waxed paper or plastic wrap, close and twist ends, and store in the refrigerator for up to 6 weeks.
FREEZING APPLES WITH SUGAR SYRUP
Fast Method, Good finished Product
1. Prepare medium syrup and set aside. Wash, peel, core, and slice apples. Use an "old-fashioned" apple peeler to save oodles of time by virtually eliminating the tedious peeling/coring by hand process. You will really have fun with your children using the peeler. Pretreat apples with an antioxidant (use 1/4 tsp ascorbic acid per quart or commercial Fruit Fresh), if desired. (Medium syrup= 8 1/4 Cups Water or Fruit Juice and 3 3/4 Cups Sugar- heat water and sugar together, bring to a boil and pour over raw fruits in jars for raw packs. For hot packs, bring water and sugar to a boil, add fruit, reheat to boiling, and fill jars immediately.)
2. Pack slices in a rigid container and cover with syrup, alllowing 1/2 inch headspace for pints and 1 inch for quarts.
3. Seal and freeze.
Freezing Apple Slices with Sugar
1. Wash, peel, core, and slice apples. Use and old fashioned apple peeler to save hours of time. Pretreat with an antioxidant , if desired.
2. Sprinkle 1/4 Cup sugar over each quart of apples; toss to coat well. Allow to stand until juice is drawn out and sugar is dissolved. Pack slices in a rigid container and cover with the resulting syrup, allowing 1/2 inch headspace for pints and 1 inch for quarts.
3. Seal and freeze.
Quick Tip for Apple Pie Filling:
An easy way to freeze apples for pies is to prepare the pie filling as you would if you were baking right away. Freeze slices in a pie tin. When frozen, slip out of the pie tin, wrap in freeezer paper, and return to freezer. When you are ready to bake, slip the frozen apples into a prepared pie shell, and bake. Thawing first is not necesary.
For more information, call toll free at 1-800-552-7323 or email me at marilyn@urbanhomemaker.com.
Reprint Permission Granted with the following information:
Copyright The Urban Homemaker 2004, "old fashioned skills for contemporary people".
Free 64-page catalogs are available by request at http://www.urbanhomemaker.com/catalog


