 AN INTRODUCTION TO WHOLE GRAIN BAKING
 WITH COOKBOOK AUTHOR
 A Diagram of a kernel of wheat is depicted here. The bran layers contain B-Vitamins
 Endosperm
..about 83 percent of the kernel weight. It is the source of white flour. The endosperm contains the greatest share of the protein in the whole kernel, carbohydrates, iron as well as many B-complex vitamins, such as riboflavin, niacin, and thiamine.
Bran
..about 14 1/2 percent of the kernel weight. Bran is included in whole wheat flour and is also available separately. Of the nutrients in whole wheat, the bran contains a small amount of protein, larger quantities of the B-complex vitamins listed above, trace minerals, and indigestible cellulose material also called dietary flour.
Germ
..about 2 1/2 percent of the kernel weight. The germ is the embryo or sprouting section of the seed, usually separated because of the fat that limits the keeping quality of flour. Of the nutrients in whole wheat, the germ contains minimal quantities of protein, but a greater share of B-complex vitamins and trace minerals. Wheat germ can be purchased separately and is included in whole wheat flour.
AN INTRODUCTION TO WHOLE GRAIN BAKING
WITH COOKBOOK AUTHOR
SUE GREGG
May 3, 2007 with Marilyn Moll, moderating
To listen to a compilation of Phone Seminars including a recording Sue Gregg talking with Marilyn regarding Whole Grains CLICK HERE.
Thursday, May 3, we talked with Sue Gregg regarding her new book, An Introduction to Whole Grains. This new book is designed to be the text book that goes with the Baking With Whole Grains Curriculum, as well as a complete cookbook on blender batter baking and the two-stage process for quick breads and yeast breads.
Sue explained the benefits of the two-stage process both nutritionally and as a convenience to the cook. One of the benefits of soaking flour is the enzymes are activated that promote digestion of the grain, and the phytates are neutralized releasing a high percentage of the minerals that would otherwise be bound up.
Sue also described her Taste and Tell Recipe Sampler recipes and some of her favorite recipes from each of the different books in the series. We wrapped up the hour with Sue answering audience questions.
Sue Gregg has made available a limited number of her recipe samplers called, Taste and Tell, to anyone ordering one or more of her cookbooks. Please request your copy of Taste and Tell when placing an order for Sue Gregg cookbooks by asking for Free Taste and Tell, in the comments section of check out or over the phone. This free offer is while supplies last
Including Sue's new book, An Introduction to Whole Grains, this popular 6-book set PLUS this long-awaited new book is on sale for $92.00 (reg. $116) with F.REE shipping!
(7-Cookbook Set includes: Main Dishes, Lunches & Snacks, Soups and Muffins, Desserts, Breakfasts, Meals In Minutes, and An Introduction To Whole Grain Baking)
Twelve Phone Seminars including this seminar with Sue Gregg are available in MP3 format on CD or electronically downloadable formats. For more information on over 12 hours of Continuing Education for Moms CLICK HERE
Basic Pizza Crust (2 crusts)
4 Cups whole wheat flour, spelt, kamut
1 TB SAF yeast
1 TB olive oil
1 TB honey
1 1/2 tsp. salt
1 1/2 Cups warm water (110 degrees)
Pre-heat pizza stone in 500 degree oven for about 30 minutes. In a mixer, add water and then remaining ingredients, adding enough flour to clean sides of the bowl. Knead dough 3-5 minutes or until gluten is developed. Remove from bowl. Roll out on cornmeal or semolina dusted pizza paddle, or pizza pan. Brush crust with oil and prick with a fork. Pre-bake 5-8 minutes in an oven with pre-heated pizza stone, if desired. Remove with paddles and proceed with favorite toppings. Use about one pound of dough per crust. Make the pizza dough more stiff than normal bread dough so that it will be easy to roll out without stickiness.
Crust Variations:
Garlic: - Add 4 or more garlic cloves chopped, minced, sauteed if desired
Herbed Dough - Add 4-10 TB minced fresh herbs or 2-6 TB dried herbs such as oregano, basil, tarragon, sage, rosemary, marjoram, Italian Seasonings while kneading dough.
Seeded Dough: Add 4 TB toasted sesame seeds to dough while kneading. Substitute sesame oil for olive oil.
Hint: Make a triple batch of pizza dough crust and pre-bake the pizza shells for approximately 5-8 minutes. Be sure to pierce the dough with a fork to avoid bubbles. Wrap well, and freeze for later use.
 For Pizza Making inspiration, read The Best Pizza is Made at Home.
Articles and Recipes authored by marilyn@urbanhomemaker.com. For more information please visit us at The Urban Homemaker Specializing in products for better health in the spirit of Titus Two.
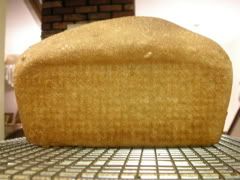
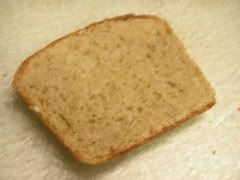
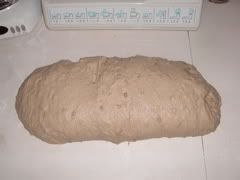
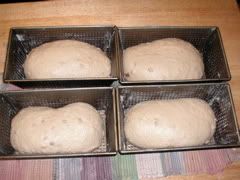
Bread Baking Problems and Solutions - Here are pictures of bread baked by me in our 8" bread pans. It makes excellent sandwiches that hold together. I used Marilyn's Famous Whole Wheat Bread Recipe.
Q. How do I get my bread to be suitable for making sandwiches?
A. There are three basic principles for making bread good enough for sandwiches.
1. Add 1/3 to ½ cup vital wheat gluten to a 2 loaf batch of bread. Make sure the gluten is fully developed. Vital gluten makes the bread softer, moister and it rises better.
2. Make sure you don't add too much flour – this leads to dry, crumbly bread when it cools. The dough should be smooth and elastic and a tiny bit tacky, not dry when shaping your loaves.
3.Don't over rise the bread – coarse texture leads to crumbly bread.
Q. Is it really cheaper to make homemade bread?
A. Cost isn't the only factor to consider when determining if bread baking is a good thing for your family. Consider the wonderful aroma in your home from home baking, and the superior nutritional value. I am glad that my homemade bread contains ingredients that I recogzine and I know how to pronounce them. Home baked bread has superior taste, and the fact that home made bread is very easy to incorporate into my routine is an added bonus. It is an added benefit to bless friends and neighbors with home baked bread.
Q. What is sponging and is it necessary?
A. Sponging is the process of allowing the yeast, water and a portion of the flour to be mixed together for about 15 minutes to activate the yeast. You could consider sponging a short, first rising. All yeast bread baking is flexible, however, and you can skip sponging and allow the bread to rise once or twice before baking. Be sure to get all the air bubbles out of the dough before shaping the loaves. Bread can rise just once in the pans before baking if you are running out of time. Conversely, bread can rise multiple times before shaping, rising, and the baking. Each rising period will improve flavor and texture. Be flexible and allow baking to fit around your schedule.
Q. I have some yeast bread recipes that do not call for fresh milled flour. How do I adjust the recipe?
A. I substitute cup for cup, whole grain hard wheat flour for all purpose flour in yeast bread recipes that appeal to me. The only adjustment I make is adding some vital gluten so the bread will not be too dense or heavy or dry.
Q. Can I use my fresh ground flour for cookies, pancakes and muffins?
A. Use freshly milled soft wheat flour or pastry wheat for any baked goods that do not contain yeast.
Remember freshly milled pastry flour must be packed like brown sugar for accurate measurements. You can obtain more information about ingredients and how to use them.
Q. My bread doesn’t rise very well.
A. Whole grain bread will not rise as well as white bread, but if you have waited several hours and the bread hasn’t doubled in size, the problem most likely is the use of low protein wheat. Low protein means low gluten content. All wheat is not created equal, and premium wheat will have a higher protein content than less expensive wheat.
Use 1 Tbsp. vital gluten per cup of flour as a starting place.
Q. I have some older yeast and I don't know if it is still good. What do I do?
A. Proofing the yeast is a way to determine if your yeast is still good. If it isn't, your bread may not rise well. If you suspect your yeast is out of date or old, here is how to proof (test) the yeast:
Add 1 tsp. yeast, with 1/2 cup warm water (85°F) and 1 tsp. sugar. If the yeast isn’t bubbling up to the top of the cup within 10 minutes, replace the yeast.
Be sure to store yeast cool and dry. Use moisture/vapor proof containers.

Step by step cinnamon Roll tutorial
Costs of Marilyn's Famous Whole Wheat Homemade Bread
Recently I have been challenged to calculate the cost of my homemade bread to see if the savings is really worth it.
This is how I calculate (estimate) the cost of bread per loaf:
My grain costs me about $20.00 per 50 lb bag. It takes roughly one
pound of flour per loaf (1.5 lb loaf).The whole wheat flour cost is 40 cents.
Water is free, but I do use filtered water so there is no chlorine or other chemical contaminants in my bread.
Saf Yeast costs me $4.99 per pkg (I use SAF Instant yeast). I would use
about 1 tsp per loaf. I calculate that cost at 5 cents, that is an estimate.
Salt is 1 tsp. I don't calculate that cost, but call it 1 cent. (I use Real Salt)
Honey and oil are my most expensive ingredients. I would use 2 TB
honey per loaf and 2 TB oil per loaf, so depending on the costs of the oil and honey you
purchase (bulk purchases are cheaper per cup). I calculate the honey cost at 25
cents (1 cup of honey costs me $2.00 because I buy it in bulk).
The oil is 2TB per loaf and I use olive oil which costs me about $13.00 for 2 qts. so
that is 20 cents for 2 TB.
Total estimated expense is $.91.
So even if your ingredient costs are more because you don't buy in
bulk, we are talking in the neighborhood of $1.00 to $1.25 a loaf. You could add in
electrical costs if you were really wanting an accurate cost, but I
think the point is homemade bread is significantly less expensive and better
quality than most store bought equivalents.
Depending on the size of your family and how many loaves of bread you
use a week, you can calculate annual savings. Large families will save a bundle!
Marilyn's Famous Bread Recipe is VERSATILE! Use it to make cinnamon rolls, pizza, bread sticks, and more. Click this link for Whole Wheat Bread Dough Variations. If you use this bread dough to make your own rolls, cinnamon rolls, pizza, etc.the savings continues to grow.
Recently a reader requested cracker recipes. I have never made crackers, so I asked readers for their input. Most readers say they are quite easy. Here are some of the many replies:
Dear Marilyn,
In answer to the request for a cracker recipe. One of the best ones I have used (since 1979) is the More-with-Less Cookbook, Wheat Thins p. 310
TIP: I usually had to remove the outer edge ones, and let the inside ones cook a ittle longer. Maybe even pull them apart to get more air. You can adjust the sweetness to your liking --- you may find these too sweet or what you are looking for. All I know is my kids love them.
Dear Marilyn,
Could you refer the person asking for cracker recipes to the book Recipes from the Old Mill. She has few in there. As far as plain "Saltine" type crackers, here is a recipe I love. I have made it with 1/2 unbleached white flour and 1/2 whole wheat, but havn't tried all whole wheat yet.
Dear Marilyn,
Here is our favorite cracker recipe:
Basic Crackers
1 c. flour, plus more as needed
1/2 teaspoon salt
2 Tb. butter
About 1/4 cup water, plus more as needed
Preheat oven to 400 degrees.
Place the flour, salt, and butter together in a large bowl or in the
container of a food processor fitted with the steel blade. Blend with
a fork or pulse, until the flour and butter are combined. Add about
1/4 c. of water and blend, then continue to add water until the
mixture holds together but is not sticky.
Roll out on a lightly floured surface until 1/4" thick, or even less.
Score lightly with a sharp knife or razor if you want to break these
into nice squares or rectangles later on. Bake on a lightly floured
baking sheet, or directly on baking stones, until lightly browned,
about 10 minutes. Cool on a rack; serve warm or at room temperature, or store in a tin.
Barbara in New York
Dear Marilyn,
Here is our favorite cracker recipe:
SESAME CRACKERS
1 3/4 cup whole wheat flour
1/4 cup sesame seeds
1/4 cup olive oil
1/2 cup water
Preheat oven to 350. Lightly oil baking sheet.
In a med. bowl combine flour and sesame seeds.
Add oil and blend well. Add water and mix to pie-
dough consistency. Roll out dough to 1/8 inch
thickness on prepared baking sheet. Score with
a knife into square or diamond shapes. Bake
about 15 minutes or until crackers are golden
brown. Cool on wire racks. Makes 3-4 doz.
The main trick I've learned for making crackers is to roll them out very
thin ON the cookie sheet and score them before baking.
Susie
Dear Marilyn,
Our favorite cracker recipes are p. 518 of Nourishing Traditions.
Ed note: Both of these receipes incorporate the principles of the 2 stage process by soaking the grain or the flour in order to neutralize the phytates and maximize nutritional value.
The below information is excerpted from A Beginner's Guide to Baking Bread ebook by Marilyn Moll. It is also available in a spiral bound edition.
I have made most all our own bread and bakery goods for the last 22 years. I will briefly outline the advantages and disadvantages of each of the electric grain mills available, from my 22 years of experience with mills.
Micronizing Grain Mills
Micronizing mills are exclusively powered by electricity and utilize technology that originally was developed for the pharmaceutical industry to derive fine, uniform powders. Modified for milling grains, micronizers are fast and capable of milling grains into very fine, powdery flour at low temperatures. My personal preference and baking experience has been exclusively with micronizing grain mills.

KITCHEN MILL Advantages - Large flour catch pan - holds 21-23 cups flour, strong reliability record, stores very compactly (if storage space is at a premium at your house you will appreciate this), produces high quality fine flour, mills all grains and dry beans, lifetime warranty on milling system/5 yr. warranty on the motor, mfg. in the USA. This grain mill was my first mill and my husband's favorite.
Disadvantages: Smaller grain hopper, noisier than certain other mills.
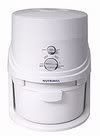
NUTRIMILL- Advantages - Large flour canister - holds 21 cups of flour, life-time warranty, large grain hopper, slightly quieter than K-tec but has the same milling system, slide out drawer contains flour mills most grains and dry beans.
Disadvantages: higher price, takes a large amount of storage space, mfg. in Korea.
 Wondermill - Advantages - Formerly known as the Whisper Mill, slightly quieter than The Kitchen Mill, large hopper capacity, six year warranty, high quality flour, grain feeds well into milling mechanism, produces flour quickly. My personal favorite grain mill. New models have a larger, more reliable motor. This grain mill is my personal preference.
Disadvantages - Smaller capacity flour canister (12 cup), does not crack grain, must turn on mill before adding grain so the mill will not jam.
Steel-Cone Burr Mill
This type of grain mill also can be operated by both hand or electric power and offers the ability to adjust the fineness of the flour from fine to cracked. Generally, the steel-cone burr will produce flour at a slower speed, but the electric version is also relatively quiet to run. Steel cone burr mills can make fine flours suitable for breads, muffins, pastries, etc, but the flour may not be as fine as stone or micronizing mills. These grain mills can also mill most whole grains and beans, but larger grains such as corn and beans will need to be cracked first, and then run through again on a fine setting if you want flour. FAMILY GRAIN MILL - Advantages - versatile; available with handbase and other food processing attachments, adjustable fine to course mechanism so mill will crack grain, can be used with Bosch Universal with an adaptor or with K-Tec Kitchenetics without an adaptor, German made, quietest mill we sell, takes minimal storage space, very economical.
Disadvantage - flour may not be quite as fine as Nutrimill, Wondermill or Kitchen Mill, slower production of flour than high speed mills.
Why Bake Your Own Bread?
I have been baking most of our family's bread for over twenty years. The satisfaction I receive each time a fragrant and beautiful loaf of bread comes out of the oven never ends. But there are many other better reasons to bake your own bread, read on:
Did you know that whole grain wheat has 26 naturally occurring vitamins and minerals along with good quality fiber and wheat germ oil? Unfortunately the refining process removes the bran, and the wheat germ oil and most of the nutritional value. White refined flour has four B-vitamins left in it which are not in the original proportions. That's It! Consuming white flour product is like being robbed. Your body needs nutrient dense foods and refined flour baked goods are devoid of health enhancing nutrition.
 Step 6: Shaping bread loaves
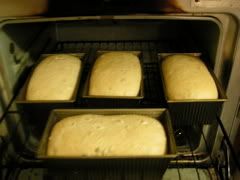 Step 7: Raising the bread loaves (2nd raising)The bread is baked through and considered done when the instant-read thermometer reaches 180-200°F. I have used 190°F with consistent results. In general, it is better to overbake bread than to under bake it.
VISIT OUR UPDATED BREAD RECIPE PAGE HERE
This recipe has been our family's daily bread for nearly 25 years and won many blue ribbons at state fairs and earned lots of money when sold at Farmer's Markets in the summer time. Give it a try!
Testimonial:
"I have been making bread for years. Yesterday I wanted to find a recipe to use with my Montana White Wheat, and I found your website. My husband and five children could not believe how excellent your recipe turned out! It is the whole wheat miracle I have always searched for. Thank you so very much for sharing." Sincerely, Kirsten Farmer
Hand Method: (yields 2 loaves)
1/3 C honey
1/3 C oil
2 1/2 C Warm Water
1 1/2 TB Saf Instant Yeast
2 1/2 tsp Real Salt
6-7 C Fresh whole wheat flour
1 1/2 TB Dough Enhancer
 Large Mixer Method: (yields 5-6 loaves)
2/3 C honey
2/3 C oil
6 C warm water
3 TB Saf Instant Yeast
1 1/2 - 2 TB Real Salt
16-20 C fresh whole wheat flour
3 TB Dough Enhancer
 Zojirushi Bakery Supreme (Auto Baker Method)
2 TB honey
2 TB oil
1 1/2 C water (90 - 100F)
1 1/2 tsp Real Salt
3 1/2 C fresh whole wheat flour
2 tsp Dough Enhancer
3 TB Vital Gluten
1 1/2 tsp Saf Instant Yeast
Combine the warm water, yeast, and 2 Cups of fresh whole wheat flour in a large mixing bowl. Allow to sponge for 15 minutes. Add the honey, oil, dough enhancer, salt and 4-5 C (12-16 C if using the Mix N Blend or (Bosch) additional flour until the dough begins to clean the sides of the mixing bowl. Do not allow the dough to get too stiff (too dry). Dough should be smooth and elastic. It is a common mistake for the beginning bakers to add too much flour.
Knead the bread by hand 7-10 minutes or until it is very smooth, elastic, and small bubbles or blisters appear beneath the surface of the dough. Six to ten minutes of kneading by electric mixer (Use speed 1 on the Bosch Universal, and use speed 4 on the Mix n Blend - or use the Auto-Knead function) should be sufficient to develop the gluten if you are using fresh flour. If you are kneading by hand, be sure to add the minimum amount of flour to keep the dough soft and pliable by using a tsp of oil on your hands and kneading surface.
Form the dough into 2 loaves if using the hand method or 5-6 loaves if using the Mix N Blend or Bosch Universal, method. Place the dough into greased loaf pans. Allow to rise in a slightly warmed oven or other warm place until doubled in size (about 30-60 minutes).
Bake loaves for 25-30 minutes in a 350 degree oven. Bread is cooked through when it sounds hollow when tapped on the bottom, and when the top and sides are a golden brown color.


This recipe has been our family's daily bread for nearly 25 years and won many blue ribbons at state fairs and earned lots of money when sold at Farmer's Markets in the summer time. Give it a try!
Testimonial:
"I have been making bread for years. Yesterday I wanted to find a recipe to use with my Montana White Wheat, and I found your website. My husband and five children could not believe how excellent your recipe turned out! It is the whole wheat miracle I have always searched for. Thank you so very much for sharing." Sincerely, Kirsten Farmer
Hand Method: (yields 2 loaves)
1/3 C honey
1/3 C oil
2 1/2 C Warm Water
1 1/2 TB Saf Instant Yeast
2 1/2 tsp Real Salt
6-7 C Fresh whole wheat flour
1 1/2 TB Dough Enhancer
Large Mixer Method: (yields 5-6 loaves)
2/3 C honey
2/3 C oil
6 C warm water
3 TB Saf Instant Yeast
1 1/2 - 2 TB Real Salt
16-20 C fresh whole wheat flour
3 TB Dough Enhancer
Zojirushi Bakery Supreme (Auto Baker Method)
2 TB honey
2 TB oil
1 1/2 C water (90 - 100F)
1 1/2 tsp Real Salt
3 1/2 C fresh whole wheat flour
2 tsp Dough Enhancer
3 TB Vital Gluten
1 1/2 tsp Saf Instant Yeast
Combine the warm water, yeast, and 2 Cups of fresh whole wheat flour in a large mixing bowl. Allow to sponge for 15 minutes. Add the honey, oil, dough enhancer, salt and 4-5 C (12-16 C if using the Mix N Blend or (Bosch) additional flour until the dough begins to clean the sides of the mixing bowl. Do not allow the dough to get too stiff (too dry). Dough should be smooth and elastic. It is a common mistake for the beginning bakers to add too much flour.
Knead the bread by hand 7-10 minutes or until it is very smooth, elastic, and small bubbles or blisters appear beneath the surface of the dough. Six to ten minutes of kneading by electric mixer (Use speed 1 on the Bosch Universal, and use speed 4 on the Mix n Blend - or use the Auto-Knead function) should be sufficient to develop the gluten if you are using fresh flour. If you are kneading by hand, be sure to add the minimum amount of flour to keep the dough soft and pliable by using a tsp of oil on your hands and kneading surface.
Form the dough into 2 loaves if using the hand method or 5-6 loaves if using the Mix N Blend or Bosch Universal, method. Place the dough into greased loaf pans. Allow to rise in a slightly warmed oven or other warm place until doubled in size (about 30-60 minutes).
Bake loaves for 25-30 minutes in a 350 degree oven. Bread is cooked through when it sounds hollow when tapped on the bottom, and when the top and sides are a golden brown color.
Marilyn's Famous Bread Recipe is VERSATILE! Use it to make cinnamon rolls, pizza, bread sticks, and more. Click this link for Whole Wheat Bread Dough Variations.
“Our ancestors, and virtually all pre-industrialized peoples, soaked or fermented their grains before making them into porridge, breads, cakes and casseroles. A quick review of grain recipes from around the world will prove our point: In India, rice and lentils are fermented for at least two days before they are prepared as idli and dosas; in Africa the natives soak coarsely ground corn overnight before adding it to soups and stews and they ferment corn or millet for several days to produce a sour porridge called ogi; a similar dish made from oats was traditional among the Welsh; in some Oriental and Latin American countries rice receives a long fermentation before it is prepared; Ethiopians make their distinctive injera bread by fermenting a grain called teff for several days; Mexican corn cakes, called pozol, are fermented for several days and for as long as two weeks in banana leaves; before the introduction of commercial brewers yeast, Europeans made slow-rise breads from fermented starters; in America the pioneers were famous for their sourdough breads, pancakes and biscuits; and throughout Europe grains were soaked overnight, and for as long as several days, in water or soured milk before they were cooked and served as porridge or gruel.” (Many of our senior citizens may remember that in earlier times the instructions on the oatmeal box called for an overnight soaking.)” (pg. 452)My bread recipes do not reflect the two-stage process, because I encourage beginning bakers to master the basics of yeast bread making before undertaking this soaking, sprouting, or fermenting method.
Program Your Zojirushi for thinner crusts:
Preheat - 0 minutes
Knead 1 - 12 minutes
Knead 2 - 0 minutes
Rise 1 - 15 minutes
Rise 2- 45 minutes
Rise 3 - 0 minutes
Bake - 45 minutes
Keep Warm - 60 minutes
If you use Marilyn's Famous Whole Wheat Bread Recipe (Zojirushi Method) you will get a 1 1/2 lb loaf of bread.
Two Stage Method:
I place the flour, vital gluten, and liquid called for in Marilyn's Famous Bread Recipe (Zo Method) PLUS 2 TB buttermilk, kefir, whey, lemon juice OR vinegar. I allow this mixture to mix for 1 minute or until the flour is moistened. Then I re-set my machine to "turn it off". I allow this mixture to sit from 8-12 hours and then I start up my machine on the Pre-programmed Homemade Cycle using the above settings. So far my bread has come out quite well!
In the winter time, I believe the preheat cycle will need to be used or a longer rising time. But I have perfected this method in the summer when my kitchen is warm with good results.
If you have other questions about using your Zojirushi Machine, please email me at marilyn@urbanhomemaker.com.
A Diagram of a kernel of wheat is depicted here. The bran layers contain B-Vitamins Endosperm
..about 83 percent of the kernel weight. It is the source of white flour. The endosperm contains the greatest share of the protein in the whole kernel, carbohydrates, iron as well as many B-complex vitamins, such as riboflavin, niacin, and thiamine.
Bran
..about 14 1/2 percent of the kernel weight. Bran is included in whole wheat flour and is also available separately. Of the nutrients in whole wheat, the bran contains a small amount of protein, larger quantities of the B-complex vitamins listed above, trace minerals, and indigestible cellulose material also called dietary flour.
Germ
..about 2 1/2 percent of the kernel weight. The germ is the embryo or sprouting section of the seed, usually separated because of the fat that limits the keeping quality of flour. Of the nutrients in whole wheat, the germ contains minimal quantities of protein, but a greater share of B-complex vitamins and trace minerals. Wheat germ can be purchased separately and is included in whole wheat flour.
Curried Quinoa Pilaf
adapted from The Versatile Rice Cooker
Quinoa is a high protein, natural whole grain which cooks into a nutty flavorful side dish. It is easily interchanged with rice in many dishes.
2 TB butter
1 C. quinoa, rinsed with cold water, drained
1 tsp curry powder
1/2 C. chopped onions
1 garlic clove, minced
1/3 C. coarsely grated carrot
1/2 tsp lemon zest
1 TB lemon juice
1/4 lb. fresh mushrooms, chopped
2 C. water
1/4 C. slivered toasted almonds
fresh cilantro leaves for garnish, optional
salt and freshly ground pepper
Turn cooker on and melt butter. Add curry powder and cook 1-2 minutes to bring out curry flavor. Add onions, garlic, carrot, and mushroom pieces. Cook, stirring, 1-2 minutes. Add water, quinoa, salt, pepper, lemon zest and juice. Cover rice cooker and cook until it shuts off. Put in serving dish and top with almonds and cilantro.
TWO STAGE PROCESS FOR PANCAKES By Kelly Moeggenborg
1. The night before mix together in a large mixing bowl:
4 cups whole wheat flour (Kelly uses freshly ground
whole grain flour, 1/2
soft berries and 1/2 hard wheat berries so it's an "all-purpose"
flour. If you pack your soft wheat flour like brown sugar, you
will not need to use any hard wheat.)
3/4 c. yogurt (I make my own, it's sooooo easy!)
2 c. milk
2. Let the flour/milk/yogurt mixture set on the counter, covered, for at least 7 hours, or overnight ( Longer soaking time means more phytic acid is neutralized, but the batter may get more sour, I usually leave it for 8 1/2 hours and it's not sour tasting at all. If you're not ready to make the pancakes or waffles yet, you can then put the bowl in the refrigerator until you're ready.)
3. In the morning mix into the batter:
4 eggs
1 T. baking powder
1 t. baking soda
1 t. sea salt
3 T. Rapadura, Turbinado, or other natural sugar
1 t. vanilla
more milk if you like it thinner
4. Bake on a medium hot griddle or waffle iron as normal. Makes a nice size batch for plenty to freeze. Yummy with butter and real maple syrup! (ed note: I certainly agree real maple syrup and butter make these extra yummy!)
To download my free e-cookbook with lots more whole grain bread recipes Fast and Health Recipe for Busy Homeschooling Moms, click on this link.
To receive my free newsletter ON MY HEART which is published twice a month with information, product updates and reviews, delicious recipes and much more in the spirit of Titus Two, click here.
If you haven't tried my blue ribbon winning Marilyn's Famous Whole Wheat Bread Recipe, here is the link to the recipe.
1 egg, beaten
1/4 Cup oil
1 C applesauce
1/2 Cup honey
1-3/4 C. whole grain pastry flour
1/2 tsp. soda
3/4 tsp. cinnamon
1/2 tsp sea salt
1-1/2 tsp. baking powder
1/4 tsp. nutmeg
1/4 C. chopped pecans or walnuts (optional)
1/2 C. raisins (optional)
Mix egg, oil, honey and applesauce in a small bowl and set aside. Assemble the dry ingredients in a medium sized mixing bowl and stir to evenly distribute spices and leavening into the flour.
Combine liquid ingredients into dry ingredients with a wire whisk gently. Carefully fold in nuts and raisins if desired and avoid over-mixing the ingredients. Fill oiled or lined muffin tins 2/3 full. Bake at 375 degrees for 15-20 minutes or until muffins are lightly browned and a toothpick inserted into the center of the muffin comes out clean. Makes 12 muffins.
BASIC FLOUR TORTILLAS
Basic tortillas are really quite simple, to make.;
2 cups whole wheat pastry flour, 7-Grain Flour, or Kamut flour
1/2 tsp. salt
1/4 cup canola
2/3 cup warm water
Rub flour, salt, and oil or shortening together with your fingers
until completely incorporated and fine crumbs form. Pour water
into dry ingredients and immediately work it in with a fork.
Dough will be in large clumps. Sprinkle with flour and knead
until smooth, about 2 minutes.
Allow the dough to sit, covered for 20-30 minutes or more and then divide
into 6-8 equal pieces. Press the tortilla out on tortilla maker with quick up and down movement. Bake the tortilla about 45-60 seconds on each side on hot griddle or skillet or tortilla maker or to desired doneness. This recipes makes - 6-8 tortillas. Double
or triple as needed.
BLENDER BANANA MUFFINS
The flavor of these go espeically well with breakfast foods. For more blender tips or to mix by hand with flour see pp 82-83 of BREAKFASTS ( use 2 cups pastry, kamut, or barley flour or 2 1/3 cups spelt flour for hand mixing.
AMOUNT: 14-16 Muffins
Bake: 325�F - 25 minutes
1. Place in blender and blend, starting at lower speed and increasing to higest speed for 3 minutes (keep batter churing):
3/4 Cup buttermilk or non dairy alternative
2 TB olive oil (Extra Virgin)
2 TB melted butter or more olive oil
1/3 Cup honey (warmed slightly if too cold and thick)
1 1/2 very ripe bananas, broken pieces (for 2/3 cup mashed)
1 tsp. cinnamon
1/4 tsp. nutmeg
Grain Choice (not flour)
1 l/3 Cups whole wheat pastry grain or 1 1/2 Cups spelt or kamut whole grain
2. Cover blender; let stand at room temperature overnight.
3. Grease or spray muffin pans.
4. Preheat oven to 325ďż˝.
5. Just before baking, add and reblend on highest speed for 1 minute:
1 egg (Or egg alternative)
6. Mix into blender batter thoroughly, but briefly, using blender and/or rubber spatual, as needed:
1 1/2 tsp. baking powder (Rumford's is aluminum free)
1/2 tsp. baking soda
1/2 tsp. salt
7. Optional -- Fold in with rubber spatula:
1/2 -3/4 Cup chopped walnuts
8. Evenly fill muffin cups almost full. Fill any empty cups half full of water. Bake 20 minutes at 350ďż˝. Cool muffins in pan for 3-5 minutes for easy removal.
This recipe is courtesy of Sue Gregg's BREAKFASTS book and reprinted by permission.
For more information, please contact me at marilyn@urbanhomemaker.com or call me at 1-800-552-7323.
BLENDER BATTER WAFFLES OR PANCAKES
1. Preheat waffle iron or pancake griddle to highest temperature.
2. Place in blender and blend at high speed for4-5 minutes or until smooth:
1 3/4 Cups buttermilk (or fruit juice or non-dairy alternative
1 egg
2 TB olive oil
1 tsp. vanilla extract
2 TB honey
1/3 Cup raw brown rice
1/2 Cup pastry wheat or kamut
1/2 Cup rolled oats
The secret to getting light and tender waffles is the thinness of the batter. The batter should always swirl about a vortex in the blender. If not, add a little liquid until the hole reappears. This is very important.
3. Blend in briefly just before baking:
1/2 tsp. baking soda
1 tsp. salt
2 tsp. baking powder (non-aluminum
4. Pour thin batter from blender onto seasoned, hot waffle iron or pancake griddle sprayed with olive oil non-stick spray. Bake about 4 minutes. Don't Peek!
For many more grain variations for pancakes and waffles see BREAKFASTS...with Blender Batter Baking and Allergy Alternatives by Sue Gregg.
This recipe is courtesy of The Urban Homemaker. For more information about methods, ingredients or books, please call 1-800-552-7323 or visit www.urbanhomemaker.com.
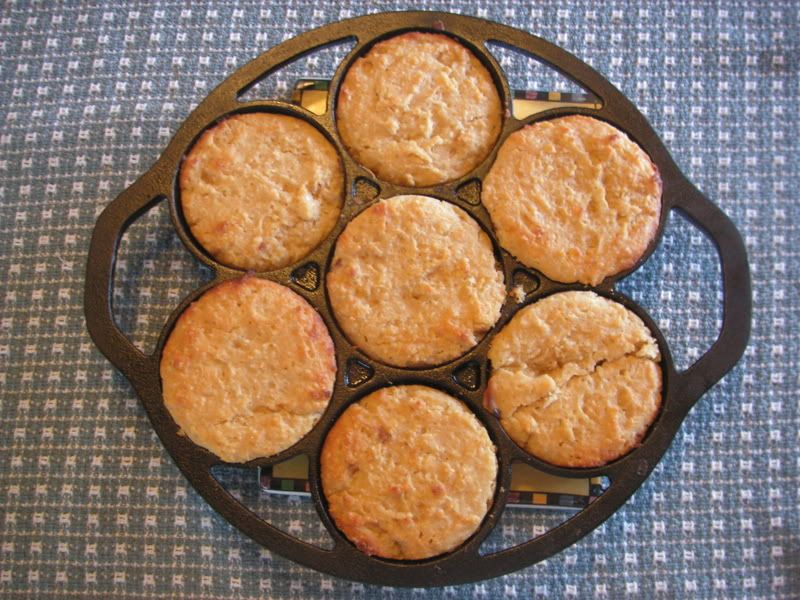 BUTTERMILK DROP BISCUITS
Very delicious and easy
2 Cups pastry or kamut flour
1 TB baking powder
1/4 tsp. baking soda
2 tsp. sugar
1/2 tsp cream of tartar
1/4 tsp salt
1/2 cup butter
1 1/4 cup buttermilk
In a bowl, stir dry ingredients together. Cut in butter to coarse crumb stage. Add buttermilk. Stir until just blended.
Drop dough into Drop Biscuit Pan or on cookie sheet to make 7 large biscuits. Fill quite full. Bake 15-18 minutes in 450 oven. Serve warm. Smaller biscuits will bake faster.
Optional: Add 2 TB finely shredded carrots, 1 TB snipped parsley or 1 TB chopped green onion
To maximize the nutritional value of these biscuits, use the two stage process by making the following adjustments:
Blend flour with melted butter or shortening and buttermilk till just moistened. Cover the top of the dough with plastic wrap to let stand for 12-24 hours which will neutralize phytic acid in the grain to release the valuable nutrients.
Then blend the rest of the dry ingredients ( leavenings, salt, sugar, and cream of tartar) into the dough. Proceed by dropping spoonfuls of batter on lightly greased cookie sheet or cast iron biscuit pan.
Chocolate Zucchini Bread
We have enjoyed this simple, bread like cake, a lot. The original recipe comes from Penzey's a spice company.
3 eggs
2 cups sugar
1 cup oil
1 tsp. vanilla
2 TB butter
6 tb cocoa powder
2 cups grated zucchini
2 cups flour
1 tsp baking soda
1 tsp. salt
1 1/2 tsp. cinnamon
2/3 cup chocolate chips
In mixing bowl combine eggs, sugar, oil, vanilla. In saucepan, melt butter and add cocoa powder. Set aside to cool. Grate zucchini. Mix zucchini, with cocoa powder/butter mixture and when cooled combine with egg mixture. Add flour, soda, salt, cinnamon. Mix only enough to blend. Coat chocolate schips in some flour to keep them from sinking. Add to batter. POur into 2 greased 8 " pans. Bake at 350 degrees for 60-70 minutes. Eat!
To improve the "healthiness" of this recipe, I substitute 1 cup honey for the sugar and cut the oil from 1 Cup to 1/2 cup and use coconut oil.
Easy Pancake and Waffle Mix
(A great gift and a delicious breakfast)
8 Cups whole wheat pastry flour, Spelt or Kamut flour*
4 tsp. salt
7 TB Baking powder
1/2 Cup fructose
2 2/3 Cup dry milk powder
Combine the dry ingredients in a large mixing bowl and stir well to distribute the ingredients evenly. Store in a Zip-loc freezer bag or other freezer cannister. Be sure to label contents and include recipe for making up a batch of pancakes.
Pancakes or Waffles
1/3 Cup oil
3 Cups Pancake Mix
2 eggs
1 2/3 Cup water
Put all the ingrdients into a blender or large mixing bowl.
Blend or stir until well mixed. Batter should be more thin than
thick, adjust liquids if necessary so batter will be pourable.
Heat griddle to medium hot. Make pancake size as desired. When
the top of the pancake is bubbly, flip to other side. Serve with
syrup, honey, apple butter, fruit syrup, fresh fruit or other
topping of choice.
For Gifts:
Package the mix in decorative jars or bags. Be sure to include
the recipes.
* Do not substitute hard wheat for pastry flour, your pancakes will be heavy and dense. Be sure to "pack" pastry flour into a measuring cup if it is freshly milled to get accurate measurements.
Articles and Recipes authored by marilyn@urbanhomemaker.com. For more information please visit us at The Urban Homemaker Specializing in products for better health in the spirit of Titus Two.
8 ounces regular oatmeal (not instant)
1 1/2 cups buttermilk
2 teaspoons baking powder
1/4 teaspoon salt
1/2 to 1 cup flour
2 tablespoons melted butter
Add the oatmeal to a bowl and cover with the buttermilk-
it should cover the oats. Let this sit overnight in the refrigerator.
The next day, add baking powder, salt and part of the flour.
Mix well with a wooden spoon, continually adding flour until dough
is no longer sticky. Place dough on greased baking sheet or in
round bread pan, forming a round loaf; brush with melted butter.
Bake 30 minutes at 325 to 350 degrees. When toothpick put into
center comes out clean, it's done. If needed, bake 10 minutes
longer or until done. Makes 1 loaf.
For more information email me at marilyn@urbanhomemaker.com.
For
a free 64 page catalog from The Urban Homemaker, click here.
Old-Fashioned Bread Pudding Soft butter Heat the oven to 325 degrees. Butter a 2 quart baking dish.
Spread a generous amount of butter on one side of each slice
of bread and line the bottom and sides of the baking dish. Mix
together the milk, eggs, sugar, salt, raisins, and vanilla and
pour over the bread. Pleace any extra pieces of bread on top
and press down so they are submerged. Let stand about 10 minutes
or longer if bread is quite dry. Bake covered for 30 minutes,
then uncover and bake for 30 minutes more. If you like a crustier
brown top, slip the dish under a hot broiler for a few minutes
until deep golden. Serve warm with whipped cream or ice cream
if you like. BASIC PIZZA CRUST 4 Cups whole wheat flour, spelt, or Kamut' Pre-heat pizza stone in 500 degree oven for about 30 minutes.
In a mixer or mixing bowl, add water and then remaining ingredients,
adding enough flour to clean sides of the bowl. Knead dough 3-5
minutes or until gluten is developed. Remove from bowl. Use about
one - one and half pounds of dough per crust. Make the pizza dough
more stiff than normal bread dough so that it will be easy to
roll out without stickiness. Roll out the pizza crust on cornmeal
or semolina dusted pizza paddle, or pizza pan. Brush crust with
oil and prick with a fork. Pre-bake 5-8 minutes. Remove with paddles
and proceed with favorite toppings. Crust Variations: Hint: Make a triple batch of pizza dough
crust and pre-bake the pizza shells for approximately 5-8 minutes.
Be sure to pierce the dough with a fork to avoid bubbles. Wrap
well, and freeze for later use. Toppings Per Pizza Crust: (Calculate amount depending
on how many pizza's are being made) 1/2- 1 Cup Pizza/Pasta sauce per crust Spread pizza sauce over the pre-baked pizza crust. Sprinkle
toppings of choice over the sauce.
2 cups fresh pressed apple cider or apple juice
Preheat your oven to 350°F.
In a saucepan combine the apple cider, cinnamon stick, and mulling
spices. Boil the mixture until it is reduced to about 1/4 cup and let
it cool. If you don't have time to simmer the cider to concentrate the flavors just use 1/4 Cup apple cider.
In a bowl whisk the pumpkin puree, eggs, oil, brown sugar, orange
zest, and the cool reduced cider. Into a mixing bowl,stir together
the flour, baking powder, salt, baking soda, mace, cinnamon, and
ground cloves. Add the chopped walnuts, and stir the batter until it
is just combined together. Transfer the batter to a well-buttered 8
1/2-inch by 4 1/2-inch loaf pan. Bake the bread in the middle of your
preheated 350°F. oven for 1 hour, or until your toothpick or cake
tester comes out clean. Let the bread cool in the bread pan.
The aroma of this bread alone wafting through your house makes this a family favorite recipe.
Old Fashioned Bread Pudding
There is no such thing as failures in bread baking - only
learning experiences. This is a good way to use up the "learning
experiences", stale bread, or leftover end pieces.
A tasty, old-fashioned dessert that comes out of the oven puffy
and slowly falls. The crust is golden and lightly crusty. Best
results is obtained from day old homemade bread.
7 slices good quality homemade bread
4 Cups milk, or substitute
3 eggs, slightly beaten
1/2 Cup Sucanat or sugar
1/4 tsp. salt
1/2 Cup raisins
1/2 - 1 tsp. cinnamon
1 tsp. vanilla
Articles and Recipes authored by marilyn@urbanhomemaker.com. For
more information please visit us at The
Urban Homemaker Specializing in products for better health
in the spirit of Titus Two.
Pizza Crust Variations with Whole Grains
Makes 2 crusts
1 TB SAF yeast
1 TB olive oil
1 TB honey
1-1/2 tsp. salt
1-1/2 C. warm water (110 degrees)
Garlic: - Add 4 or more garlic cloves chopped, minced, sauteed
if desired .
Herbed Dough: - Add 4-10 TB minced fresh herbs or 2-6 TB
dried herbs such as oregano, basil, tarragon, sage, rosemary,
marjoram, or Italian Seasonings while kneading dough.
Seeded Dough: Add 4 TB toasted sesame seeds to dough while
kneading. Substitute sesame oil for olive oil.
Mix and match, choose as many or as few toppings as desired
1-2 Cups Italian or Mozzerella Cheese, shredded
1 oz - Pepperoni
1/4- 1/2 Cup onion, chopped
1/2 Cup Italian sausage, crumbled and cooked
1/3 cup finely chopped green pepper and red pepper
1/2 Cup sliced mushrooms
Bake pizza on pizza stone or in pizza pan until cheese is melted
and lightly browned, about 100-15 minutes in a 400° oven.
Pumpkin Cider Bread
Pumpkin Cider Bread (Makes 1 loaf)
1 cinnamon stick
1 tablespoon mulling spices
1 cup canned or fresh homemade pumpkin puree
2 large fresh eggs
1/4 cup vegetable oil
3/4 cup Sucanat or light brown sugar, firmly packed
1 tablespoon freshly grated orange zest (optional)
2 cups whole wheat pastry flour or all purpose flour
2-1/2 teaspoons double-acting baking powder
1/2 teaspoon salt
1/2 teaspoon baking soda
1/4 teaspoon ground mace
1/4 teaspoon cinnamon
1/8 teaspoon ground cloves
1/2 cup chopped walnuts
Wheat Germ Zucchini Bread
A family favorite! The maple flavor makes this a very unique and delicious variation for zucchini bread. A tasty way to sneak in veggies and whole grains.
3 eggs, beaten
3/4 C. honey
1/2 C. cooking oil
3 tsp maple flavoring
2 C. coarsely shredded, peeled, packed zucchini
(about 3 medium zucchini)
2 tsp soda
1 tsp baking powder
1 tsp salt
1/2 cup regular wheat germ (opt.)
2 1/2 cups whole wheat pastry flour or other whole grain flour
1 cup chopped walnuts
1/3 cup sesame seeds
Beat together eggs, honey, oil, and maple flavoring until foamy and thick. Stir in zucchini. Add soda, baking powder, salt, wheat germ and flour. Mix well. Add nuts. Spoon batter into two greased and floured loaf pans, 9"X5". Sprinkle tops with sesame seeds. Bake in oven preheated to 350 F about one hour or until wooden pick inserted in center comes out clean. Cool bread in pans about 10 minutes before removing from pans. The zucchini has a wonderful distinctive flavor.
The below information is excerpted from A Beginner's Guide to Baking Bread ebook by Marilyn Moll. It is also available in a spiral bound edition.
I have made most all our own bread and bakery goods for the last 22 years. I will briefly outline the advantages and disadvantages of each of the electric grain mills available, from my 22 years of experience with mills.
Micronizing Grain Mills
Micronizing mills are exclusively powered by electricity and utilize technology that originally was developed for the pharmaceutical industry to derive fine, uniform powders. Modified for milling grains, micronizers are fast and capable of milling grains into very fine, powdery flour at low temperatures. My personal preference and baking experience has been exclusively with micronizing grain mills.
KITCHEN MILL Advantages - Large flour catch pan - holds 21-23 cups flour, strong reliability record, stores very compactly (if storage space is at a premium at your house you will appreciate this), produces high quality fine flour, mills all grains and dry beans, lifetime warranty on milling system/5 yr. warranty on the motor, mfg. in the USA. This grain mill was my first mill and my husband's favorite.
Disadvantages: Smaller grain hopper, noisier than certain other mills.
NUTRIMILL- Advantages - Large flour canister - holds 21 cups of flour, life-time warranty, large grain hopper, slightly quieter than K-tec but has the same milling system, slide out drawer contains flour mills most grains and dry beans.
Disadvantages: higher price, takes a large amount of storage space, mfg. in Korea.
Wondermill - Advantages - Formerly known as the Whisper Mill, slightly quieter than The Kitchen Mill, large hopper capacity, six year warranty, high quality flour, grain feeds well into milling mechanism, produces flour quickly. My personal favorite grain mill. New models have a larger, more reliable motor. This grain mill is my personal preference.
Disadvantages - Smaller capacity flour canister (12 cup), does not crack grain, must turn on mill before adding grain so the mill will not jam.
Steel-Cone Burr Mill
This type of grain mill also can be operated by both hand or electric power and offers the ability to adjust the fineness of the flour from fine to cracked. Generally, the steel-cone burr will produce flour at a slower speed, but the electric version is also relatively quiet to run. Steel cone burr mills can make fine flours suitable for breads, muffins, pastries, etc, but the flour may not be as fine as stone or micronizing mills. These grain mills can also mill most whole grains and beans, but larger grains such as corn and beans will need to be cracked first, and then run through again on a fine setting if you want flour.FAMILY GRAIN MILL - Advantages - versatile; available with handbase and other food processing attachments, adjustable fine to course mechanism so mill will crack grain, can be used with Bosch Universal with an adaptor or with K-Tec Kitchenetics without an adaptor, German made, quietest mill we sell, takes minimal storage space, very economical.
Disadvantage - flour may not be quite as fine as Nutrimill, Wondermill or Kitchen Mill, slower production of flour than high speed mills.
SELECTING A GRAIN MILL
When someone becomes interested in better nutrition for their family through learning to bake whole grain breads, the question I am invariably asked most often is, "Which grain mill is the best?" Possibly you, the reader, have also asked that question.
You also may be wondering what the benefit of milling your own flour might be, and if a grain mill is worth the expense. Consider that freshly milled whole grain flours are nutritionally superior to commercial whole grain flours. Not only that but freshly milled flours taste better and perform much better in whole grain recipes. Because whole grain flours deteriorate quickly due to oxidation and the onset of rancidity due to natural oils, freshly milled flour is more capable of providing superior nutrition and taste. In fact, flour begins to oxidize as soon as it is milled and within 24 hours nearly half the nutrients are oxidized. Oxidation occurs because every flour particle is now exposed to air which causes the onset of rancidity. Also, unmilled whole grains will generally store indefinitely, with no negative effect on nutritional value until the hull of the grain is broken by milling or cracking. Finally consider that home milled flour is more economical per pound than whole grain flour available in food stores.
If you are convinced, as I and thousands of others are, that
home milled flour is the best choice and are ready to purchase
a grain mill or replace an ageing grain mill, "the best grain
mill" is the mill
which meets your personal criteria for price, noise level, storage
space requirements, warranty, and versatility. I have found that
my favorite grain mill may not appeal to you, based on your criteria.
Keep in mind that electric grain mills are for meant for
grinding grains and dry beans only; they are genearally not used
for oily seeds or coffee.
Electric grain mills offer a number of benefits over hand-operated (non-electric) mills. Non-electric or grain mills require a significant time commitment just to mill one cup of flour! On average, it takes about 15-20 minutes of hand cranking to produce enough flour for just one loaf of bread. Although non-electric mills are ideal for emergencies if electrical power is lost, my experience is that long term power outages are rare and most families quickly lose their commitment to tedious hand milling on a regular basis.
Steel-Cone Burr vs. Stone Mills vs. Micronizing Grain Mills
Most of the grain mills on the market fall in the categories of Steel-cone Burr Mills, Stone Mills, and Micronizers.
Stone Mills - These mills have the ability to mill fine flours and can be adjusted for a range of flours from fine to cracked grain consistency. The more oily grains and beans should not be used as they will cause the stones to glaze over. Periodically, the stones will need cleaning to remove fine flour particles that lodge within the stones. In addition, stones wear out over time and need replacing from time to time, depending on how much you use your mill. Also the vast majority of stones mills have aluminum in the stones that is used as a binder to hold the stones particles together so if you are concerned about aluminum in your diet you may want to avoid stone mills. Depending on their speed of operation, they may also het up the flour to the point of nutrient deterioration.
Steel Cone Burr Mills - These mills use a stainless steel milling head. They too can grains into a range of from fine to cracked grain consistency, however they may not be able to mill as fine as a stone mill is capable. You can, however, mill a wider variety of grains and beans than a stone mill without fear of gumming up the milling heads, and they are easy to clean. Generally the steel-cone burr mill will produce flour at a slower speed, and as a bonus, operate more quietly than other mills. Steel cone burrs will mill most whole grains and beans, but corn and beans will need to be cracked first, and then run through again on a finer setting if you want bean or corn flours. For the most part the fine flour produced is suitable for breads, muffins, pastries, etc, but the flour will not be as powdery fine as you may desire.
Micronizing Grain Mills - These are considered the "newer technology" mills that have borrowed technology that originally was developed for the pharmaceutical industry. A micronizer is made up of concentric circles of stainless steel "teeth" which spin at a very high speed. They don't "grind" the grain as the other mills do, but rather "burst" the grain into flour when the grain comes in contact with the stainless steel milling teeth. The result is fine, uniform particle-sized flours in a fraction of the time that other mills take. Because the milling heads are not "grinding" the grain, the result is low-temperature milling. These mills will produce the finest flours and will adjust to as coarse as corn meal. Since micronizers run at very high speeds they produce flour more quickly than a steel-cone burr or stone mills, but they generate higher levels of noise. Just how much noise, you ask? Well, I've come to believe that noise is in the ear of the beholder so that can be difficult, in that sense, to quantify, but suffice it to say that they are louder. These are also the most popular type of mill on the market, and it is rare to receive a complaint regarding the noise level. In my opinion, the main drawback to micronizing mills is that they do not crack grains, and the fineness adjustments are very limited.
I have used all the grain mill discussed below and find they are all good quality, produce great flour, and offer years of reliable service. I have outlined advantages and disadvantages of each of the most popular and reliable electric grain mills that I know of based on my 22 years of experience. Remember, there is no perfect grain mill, and the best mill is the one that meets your criteria. If you would like more information about grain mills please contact me at urbanhome@tds.net.
Grain Mill Comparisons
THE
KITCHEN MILL - Micronizer
Advantages - Large flour canister- holds 21 cups of flour, strong
reliability record, stores very compactly (if storage space is
at a premium at your house you will appreciate this), produces
high quality, fine flour, mills a wide variety of dry beans and
grains, is made in the USA., and comes with a six year warranty
with a limited lifetime warranty on the milling heads. We have
sold thousands to satisfied customers over the last 16 years.
It is my husband's favorite mill. My first Kitchen Mill lasted
12 years and was used heavily including milling flour for bread
baking classes.
Disadvantages: Smaller grain hopper than some mills, Noisier than
other mills, does not crack grain.
NUTRIMILLL
- Micronizer
Advantages - Large flour canister, life-time warranty, one piece
construction, large grain hopper, flour canister holds about 20
cups of flour, slightly quieter than The Kitchen Mill but has
the same milling device.
Disadvantages - Higher price, does not crack grain, takes a larger
amount of storage space, mfg. in Korea.
WONDER
MILL - Micronizer
Advantages - Formerly known as the Whisper Mill, slightly quieter
than The Kitchen Mill, large hopper capacity, six year warranty,
high quality flour, grain feeds well into milling mechanism, produces
flour quickly. My personal favorite grain mill. New models have
a larger, more reliable motor.
Disadvantages - Smaller capacity flour canister (12 cup), does
not crack grain, must turn on mill before adding grain so the
mill will not jam.
FAMILY
GRAIN MILL - Steel Cone Burr
Advantages - Versatile, can be used with hand base or electric
motor base, adjustable from fine to coarse mechanism so this mill
will crack grain. Will fit on the Bosch Universal when ordered
with correct configurtion, German made, very quiet while running,
takes minimal storage space, very economical.
Disadvantage- flour may not be quite as fine as the mills above,
slower production of flour than high speed mills.
Conclusion
When I purchased my first grain mill, I took a VERY deep breath about investing so much money in a kitchen appliance when we had so many other needs and so little disposable income. Obviously, I have never regretted the expense and I don't think you will either, if you have been led of the Lord to improve the quality of the breads you serve your family.
Some readers may worry or agonize that their husbands and kids will object to healthy whole grains. Taste buds will adjust over time. When my daughter was about 4 or 5, I had run out of bread, so I ran to the store, bought some Roman Meal, and prepared her sandwich for lunch. After a few bites Laura's response was, "Mommy, this bread tastes funny!" Your family will adjust to the delicious and nutritious whole grain breads you serve and I know that as you commit your way to the Lord, He will direct your path.
 For more information check out A Beginner's Guide to Baking Bread by Marilyn Moll
The Two Stage Process
A Preparation Method Maximizing the Nutritional Value of Whole Grains
by Sue Gregg reprinted by permission
Just because you've switched from white flour to whole grains does not
mean that you are getting all the nutritional value. In fact you may
experience new problems with digestion. That is because whole grains contain
phytic acid in the bran of the grain. Phytic acid combines with key
minerals, especially calcium, magnesium, copper, iron, and zinc and prevents
their absorption in the intestinal tract.
Soaking, fermenting, or sprouting the grain before cooking or baking
will neutralize the phytic acid, releasing nutrients for absorption. This
process allows enzymes, lactobacilli and other helpful organisms to not only
neutralize the phytic acid, but also to break down complex starches,
irritating tannins and difficult-to-digest proteins including gluten. For
many, this may lessen their sensitivity or allergic reactions to particular
grains. Everyone will benefit, nevertheless, from the release of nutrients
and greater ease of digestion.
The first stage of preparation in making whole grain porridges or baked
recipes, is to soak the whole grain flour in an acid medium such as
buttermilk, yogurt, or other cultured milk, or in water with whey, lemon
juice or vinegar added. As little as 7 hours soaking will neutralize a large
portion of the phytic acid in grains. Twelve to 24 hours is even better with
24 hours yielding the best results.
Brown rice, buckwheat and millet are more easily digested because they
contain lower amounts of phytates than other grains, so they may be soaked
for the shorter times. Other grains, particularly oats, the highest in
phytates of the whole grains, is best soaked up to 24 hours.
There are two other advantages of the two-stage process. Several hours
of soaking serves to soften the grain, resulting in baked goods lighter in
texture, closer to the texture of white flour. The longer the soaking, the
less necessary is the baking powder. Baking soda, alone, will give enough
rise. Secondly, this is a great step in convenience, dividing the task into
two shorter time periods, cutting the time needed to prepare the recipe
right before cooking and baking when you feel rushed to get food on the
table.
Our blender batter baking recipes include the soaking process as a
recommended option. Our preferred acid medium is buttermilk, but you can
substitute an equal amount of water with whey, lemon juice or vinegar--2
tbsps. per cup--as an alternative.
We encourage you to use the two-stage option, because we suspect that
many problems with whole grains would be minimized. Nutritional value and
appetite appeal are enhanced. As Sally Fallon and Mary Enig, PhD point out
in Nourishing Traditions, "...virtually all preindustrialized peoples,
soaked or fermented their grains before making them into porridge, breads,
cakes and casseroles." p. 452.
You may read more information about Sue Gregg's six volume cookbook set at this link.
Join our on line discussion for more information here. This is a double opt-in newsletter, be sure to confirm your subscription, the link will come in a separate email.
For more information email me at marilyn@urbanhomemaker.com
The following article The Two Stage Process - Maximizing Nutritional Value was written by Sue Gregg of Sue Gregg Cookbooks and is used by permission.
Just because you/ve switched from white flour to whole grains does not mean that you are getting all the nutritional value. In fact you may also experience new problems with digestion. That is because whole grains contain phytic acid in the bran of the grain. Phytic acid combines with key minerals, especially calcium, mangesium, copper, iron, and zinc and prevents their absorption in the intestinal tract.
Soaking, fermenting or sprouting the grain before cooking or baking will neutralize the phytic acid, releasing these nutrients for absorption. This process allows enzymes, lactobacilli, and other helpful organisms to not only neutralize the phytic acid, but also to break down complex starch, irritating tannins, and difficult-to-digest proteins including gluten. For many, this many lessen their sensitivity or allergic reactions to particular grains. Everyone will benefit, nevertheless, from the release of nutrients and greater ease of digestion.
The first stage of preparation in making whole grain porridges or baked recipes, is to soak the whole grain flour in an acid medium such as buttermilk, yogurt, or other cultured milk, or in water with whey, lemon juice or vinegar added - 1 TB per cup water. As little as 7 hours soaking will neutralize a large portion of the phytic acid in grains. Twelve to 24 hours is even better with 24 hours yielding the best results.
Brown rice, buckwheat, and millet are more easily digested because they contain lower amounts of phytates than other grains, so they may be soaked for the shorter times. Other grains, particularly oats (the highest in phytates of the whole grains) is best soaked up to 24 hours.
There are two other advantages of the two-stage process. Several hours of soaking serves to soften the grain resulting in baked goods lighter in texture, closer to the texture of white flour. The longer the soaking, the less necessary is baking powder. Baking soda, alone, will give enough rise. Secondly, this is a great step in convenience, dividing the task into two shorter time periods, cutting the time needed to prepare the recipe right before cooking and baking when you feel rushed to get food on the table.
Blender batter baking recipes should also include the soaking process as a recommended option. Sue Gregg prefers acid medium of buttermilk, but you can substitute an equal amount of water with whey, lemon juice or vinegar - 1 TB per cup--as an alternative.
We encourage you to use the two-stage option, because we suspect that many problems with whole grains would be minimized. Nutritional value and appetite appeal are enhanced. As Sally Fallon and Mary Enig, PhD point out, "..virtually all preindustrialzied peoples, soaked or fermented their grains before making them into porriddge, breads, cakes and casseroles." Nourishing Traditions. p. 452. I recommend this book as a supplemental text to Sue Gregg's cookbooks. To order, call 1-800-552-7323 or go to urbanhomemaker.com.
Thank you to all the contestants for participating in our first annual Bake and Take Contest!
First Place Winner of Norwex Microfiber Enviro Cloth and Window Cloth: Laura Weimer
Here is Laura's prize winning entry and recipe:
The moment I read about Bake and Take day I just knew what we would bake and who we would take it to. About a year ago a neighbor friend who is a Christian was going through some difficulties in her marriage and thinking I would be helpful gave her some unsolicited advice and ended up offending her and I thought I had ruined the friendship.
I quickly apologized but always felt like there might still be awkwardness with us. She is currently living with her 2 young children and working part-time so I know she doesn't have as much time as she would like to bake, but I also know she is very health conscience. I thought it would be the perfect opportunity to minister to her and hopefully fully restore a relationship.
My three kids and I (ages 6, 4 1/2, and 3) love to make Bran Flax Muffins. My 6 year old peels and grates the carrots (using the kitchen-aid) and I peel and slice the apples and he grates them.
My 4 year old helps measure the flour, and other dry ingredients and cracks the eggs, and my 3 year old puts in a few fistfuls of raisins and lines the muffin tins with paper muffins cups. I pour the liquids, then mix all the ingredients, and then we all get spoons and spoon the batter into the muffin cups. The 6 and 4 year old get hot pads and put the pans into the oven and set the timer. It's so much fun and makes preparing them a lot less work..well, sort of.
We got a basket, lined it with tissue paper, wrapped the muffins in a plastic bag and put lots of curly ribbon all over the basket. I had a little note card with pretty flowers and a nice saying about God being all we need for life and happiness and we marched it over. She was really excited and said she and her kids loved these muffins. I had a chance to thank her for letting me back into her life and I felt like we were able to get rid of any awkwardness that might have been there. I felt really joyful afterward and thought I might even feel more thankful after the whole thing than she did! Thanks for giving me a reason to reach out again to a neighbor and restore a friendship.
Here is Laura's Bran Flax Muffins Recipe:
Mix together:
1 1/2 c whole wheat pastry flour
3/4 c oat bran
3/4 c flaxseed meal
1 c brown sugar
2 tsp baking soda
1/2 tsp salt
1 tsp baking powder
2 tsp cinnamon
Stir in:
1 1/2 cups carrots, grated
2 cups apples, peeled & grated
1/2 cup raisins
Combine:
3/4 c milk
2 eggs beaten
1 tsp vanilla
then add to dry ingredients. Stir until moistened. Do not over mix. Fill muffin cups 3/4 full. Bake at 350 degrees F for 15-20 minutes.
Second Place Winner of 2-Norpro 8" Bread pans: Bobbi Krenka
My name is Bobbi and I read about the bake and take bread day
in your newsletter. My son who is 10 came home from school and
told me about the 2nd grade teacher who just had a breast removed
due to breast cancer. She has 2 boys in grade school as well as
a husband. We made some cookies, loaf of whole wheat bread, and
made a card to let them know we were praying for her and her family.
While my son was in his self defense class I was going to sneek
it in their car, but it was locked. So I had to go and tell her
husband that I had something for them. I gave it to him and the
look on his face was very humbling for me and he told me how thankful
he was. It made the cookie mess that we had left in the kitchen
all worth while.
Thank you.
Whole Wheat Bread in a Zo
11/2 c water
41/4 c whole wheat flour
2 tbls dry milk
3 tbls brown sugar
2 tbls gluten
1 tsp dough enhancer
2 tbs salt
1 3/4 tsp SAF yeast
I have a ZO bread maker and I just put in on quick bread setting.
it makes a good size loaf. I haven't had my breadmaker to long
and have had a little trouble at first. We live at about 6500
ft and I had to do a little experimenting.
Honorable Mention (In no particular order):
#1. Heather Kleveter's Entry: I was so excited to read about
your Bake and Take contest...what a great idea!! Any excuse to
bless a friend or relative with gifts from the kitchen is a good
excuse for me.
I had it all figured out. My sister-in-law in California just
had a baby boy and so we planned a vacation to go meet our sweet
new nephew and cousin. I would bake a batch of my Spelt English
Muffins to take along as a gift for my sister-in-law. They were
a hit at the Farmers' Market last summer, they freeze great, and
as any new mom knows... it's such a blessing to have something
quick and nutritious to eat when you are a sleep-deprived nursing
mother!
Then we got the flu. All seven of us! It takes a l-o-n-g time
for the flu to run it's course through that many people. With
tears, we postponed our trip and crawled back into bed. There
was NO way I would be taking baked goods anywhere, let alone cook
at all! We were surviving on instant food.
After I started to get my strength back, I asked my husband what
he would like me to fix. "Something healthy" was his
reply (you know that craving you get when you haven't had a good
home-cooked meal in awhile!). Then it occurred to me how very,
very blessed I am! And what a wonderful thing a family is! Even
if I didn't have the strength to get dressed and brush my hair,
my family didn't mind. Even if I was coughing and sniffling, it
didn't matter...so was everyone else! So I didn't have to take
my baking far...just across the kitchen to the table. And all
5 of my kids and my dear husband were blessed and nourished...and
so very grateful for a home cooked breakfast.
Here's what I made:
Blender Lemon-Ginger Pancakes
wheat-free, dairy-free
the night before you want to eat these...
Add to blender:
Juice and zest from 1 large lemon
plus enough water to = 2 cups of liquid
1 Tbsp. olive oil
1 Tbsp. molasses
1 tsp. vanilla
1 c. Kamut
1/2 c. millet
1/2 c. whole barley
cover and blend on high for 3 minutes.
--------------zzzzzzzz-------------------------------
In the morning, at the skillet pre-heats, add:
2 eggs
1 tsp. salt
1 1/2 tsp. ginger powder (good for nausea!)
1/2 tsp. cinnamon
and blend for 1 minute
then add and blend briefly (or stir by hand) until mixed:
2 tsp. baking powder
1 tsp. baking soda
Add a dab of butter to the hot skillet, pour on the batter. Flip
when bubbles form and edges are dry. Add more butter between each
batch. Serve with pure maple syrup...yum!
P.S. We are all recovering nicely and are soooo ready for that
postponed vacation! Here's the recipe I'll be taking next weekend!
Spelt English Muffins (with fruit & nuts)
18 c. freshly ground spelt flour (spelt is fluffier than other
grains so pack it a bit when measuring)
5 c. water
2/3 c. honey
1/4 c. molasses
1/2 c. olive oil
2 Tbsp. sea salt
1/3 c. whey (pour all natural plain yogurt into a sieve lined
with cheese cloth or an un bleached coffee filter, place over
a bowl and let sit for a few hours. Whey is the liquid in the
bowl. We blend the yogurt cheese with jam, using a hand held blender...delicious
as a pancake topping or alone!)
a pinch of vitamin C powder, optional
Warm water, honey, molasses and oil together on stove top. Pour
this mixture into Bosch (or other bread mixer) bowl. Add salt,
vit. C and mix briefly. Add flour, mixing after every 5 cups.
Remove dough hook, cover and soak overnight, 7-24 hours. This
allows the acidic whey to break down the phytic acid in the whole
grains so all the nutrients can be properly absorbed.
After soaking, add:
2 eggs, which have been warmed in a bowl of warm water, before
cracking
1/4 c. instant yeast (SAF)
plus more flour (up to 2 cups) if needed, until the dough pulls
away from the sides of the bowl
Mix slowly at first to incorporate eggs, then knead for about
6-8 minutes on high until the dough will stretch very thin and
translucent when you pull up on a piece.
Let the dough rest for approximately 15 minutes.
This is the fun part where you get to pick your flavor...any chopped
nut or dried fruit!
I like to add:
cranberry & almond
walnuts, pecans & golden raisins
cinnamon & raisin
Just grab a handful and knead it in!
Then roll the dough to about 3/4 " thick on a greased counter.
Cut out circles using a biscuit cutter or a clean, empty tuna
can.
Place on a greased cookie sheet that has been sprinkled with oat
bran. Spritz top of muffins with water (or cooking spray) and
sprinkle with oat bran. Cover with a towel and let rise foe 15
minutes.
Meanwhile, preheat an electric griddle to about 240 degrees (low
temp). Cook muffins for about 9 minutes on each side, until golden
brown. Split with a fork These freeze great! Enjoy!
Thank you for your ministry, Marilyn!
#2 My name is Amy and I started baking bread about 3 years ago. I have struggled with the quality of the bread and have gone through many experimental fixes trying to get a texture that would hold up for sandwiches. I also taught a neighbor to bake, and she, too, would love to have a moist, soft, full loaf. Our struggle seems to be primarily that we live at 9,100 feet in elevation and would get bread that would fall, be coarse and crumbly, or be too yeasty.
So, I finally baked a great loaf and took it to her, as proof
that it can be done. She was delightfully surprised, and is anxious
to try my new method. (The secret is in mastering the yeast; don't
kill the yeast with hot water, don't add too soon, don't let rise
too much, don't knead it to death, don't work the dough too much
or too rough, and, don't use a dry dough as the yeast absorbs
a lot of moisture, leaving a dry loaf).
Bread with Altitude by Amy Hoppes
Makes 2 loaves
5 1/4 C. whole wheat Prairie Gold berries, milled and set aside
_____________________________________
Proof:
1 1/2 Tbls. Yeast Sprinkled over;
2/3 C. Warm Water with
1 1/2 Tbls. organic sugar, sprinkled over all.
Let set about 10 min. to dissolve
Meanwhile....
_____________________________________
Scald 2 1/2 C. Milk. Put in Kitchen-Aid mixer, and add;
Half of the flour
2 large eggs
1/2 C. organic sugar
3/4 tsp. Salt
Beat 5 min. Then add:
The proofed yeast mixture,
1/3 C. oil (canola, Olive, or comb. of 2 part butter, and 1 part
coconut oil)
2 Tbls. Vital Wheat Gluten,
and most of the remaining flour.
Knead to a slightly sticky consistency.
_____________________________________
Put in large buttered Bowl (turn, and optional, dot and spread
a bit of butter on top) Cover with damp towel and let rise in
draft free location for 15 min (30 if in the mile high range).
Dump on counter - shape lightly - put back in bowl to rise a second
time in draft free location for 15 min (30 if in the mile high
range).
Dump out, and cut evenly for loaves or rolls etc. (two loaves,
or a loaf and some cinnamon rolls, etc.) Put in buttered pans
and let rise to top of pan about 10 min. and about 5 min. more
while you pre-heat the oven to 350 degrees.
Bake 30 min. at 350 degrees in convection oven if available. Test
with instant thermometer to read 180 degrees, remove from pans
immediately, wipe pans with paper towel, and let bread cool completely
(at least one hour).
I have sent each Honorable Mention Participant a Norwex
Microfiber face cloth just for participating in our contest.
Thanks to all the participants!
Liquid - The liquid in yeast breads may range from water, milk, and potato water to fruit juice, buttermilk, yogurt, cottage cheese, whey and bouillon. Liquids used in yeast breads should be sufficiently warm so that after the sweetening and shortening are added the temperature of the combination is at least 80° or slightly above.
Sweetening - The sweetening used can be honey, molasses, applesauce, fruit juice, or sugar. Some breads use no sweetening at all.
Yeast - Yeast is a living organism that grows in the presence of moisture and carbohydrates at a warm temperature (l06 - l20°). Under these conditions the yeast ferments, forming gases. These gases are captured by the rubbery gluten in flour. Like a balloon, gluten is stretched (blown up) by the gases, causing the bread to raise. All commercial yeasts are not the same because the quality can vary. Saf Yeast can be stored in the freezer for several years and used as needed. Saf Yeast will store, unopened, on the
shelf for one year. It is a good item for food storage.
Fats/Oils - The fats/oils in yeast breads may be cold-pressed oil, shortening, butter, margarine, bacon grease, or animal fat. The fats/oils make bread tender and rich. Dough made without fats/oils tends to become stale more quickly. Butter is particularly delicious when used in sweet yeast breads and rolls.
Salt - Salt brings out the flavor of the bread. The texture and shape of bread is affected by the omission of salt because it controls yeast activity. Bread low in salt will have a coarse texture.
Flour - Fresh ground whole grain flour adds the most flavor, nutrients, and gluten to the bread and results in superior products. Whole grain flours other than wheat may be used for their distinctive flavors. However, they tend to make bread heavy as they do not have enough gluten to help lift the dough. Replace no more than one-fourth of the flour content in a given recipe with flours other than wheat or add vital gluten.
Other Additions - Raisins, dates, dried fruits, citron, nuts, hulled sesame and roasted hulled sunflower seeds, sauteed onions, dried or fresh herbs, bean or grain sprouts, toasted wheat germ, milk solids are all added to improve flavor and increase nutritional values. These "improvers" are seldom used in greater quantity than up to about one-fourth the weight of the flour.
To receive my free newsletter ON MY HEART which is published twice a month with information, product updates and reviews, delicious recipes and much more in the spirit of Titus Two, click here.
If you haven't tried my blue ribbon winning Marilyn's Famous Whole Wheat Bread Recipe, here is the link to the recipe.
Complimentary copies of our 64 page catalog of products for homemakers is available here.
Bread Machine Tips How to trouble shoot those less than perfect loaves and have success
1. If your bread falls: try reducing the liquid by 1/8 Cup and/or increasing salt by 1/8 tsp and/or decrease yeast by 1/8-1/4 tsp.
2. If you loaf is too short or heavy: Decrease salt by 1/8 tsp and or increase yeast and sugar by 1/2 tsp and/or use high quality freshly milled hard wheat and or add 1-3 TB vital gluten and/or increase liquid temperature to 100-110 degrees F.
3. If the crust is too thick: Use home made programming feature to cut the baking time to 45 minutes and/or reduce sweetener and/or increase liquid by 1/8 cup.
4. Kneading arm is hard to remove: Spray the post and inside hold of the kneading arm with non-stick cooking spraky prior to baking and/or soak baking pan in hot water for 5-10 mijnutes to soften crust, then remove arm from post.
Articles and Recipes authored by marilyn@urbanhomemaker.com. For more information please visit us at The Urban Homemaker Specializing in products for better health in the spirit of Titus Two.
I have briefly outlined advantages and disadvantages of each of the electric grain mills available from our 20 years of experience with mills. Keep in mind, all of these mills are high quality and produce excellent, fine quality flour; there is no "perfect" or "best" grain mill. Each mill represents exceptional quality, reliability and will provide many years of service.
The "best" grain mill, is the mill that meets your criteria for price, noise level, storage space
requirements, warranty, and versatility.
KITCHEN MILL - Advantages - Large flour catch pan- holds 21 cups flour, strong
reliability record, stores very compactly (if storage space is at a premium at your house you will appreciate this), produces high quality, fine flour, mills all dry beans and grains, mfg in the USA. Six year warranty. We have sold thousands to satisfied customers over the last 15 years.
Disadvantages: Smaller grain hopper than some mills, Noisier than other mills, does not crack grain.
NUTRIMILL -Advantages - Large flour catch pan, life-time warranty, one piece
construction, large grain hopper slightly quieter than K-tec but has the same motor and milling device.
Disadvantages - Higher price, does not crack grain, takes a larger amount of storage space, mfg. in
Korea.
WONDERMILL - Advantages - Formerly known as the Whisper Mill, slightly quieter than K-tec, large hopper capacity, six year warranty, high quality flour, grain feeds well into milling mechanism
Disadvantages- Smaller capacity flour cannister (12 cup), does not crack grain, must turn on mill before adding grain so the mill will not jam.
FAMILY GRAIN MILL - Advantages - versatile, can be used with handbase or electric motor base, adjustable from fine to course mechanism so mill will crack grain, can be used with Bosch Universal, German made, very quiet while running, takes minimal storage space, very economical.
Disadvantage- flour may not be quite as fine as the mills above, slower production of flour than high speed mills.
We hope to be of service to you very soon!
www.urbanhomemaker.com
1-800-552-7323
"A member of the goosefoot family (Chenopodium quinoa), quinoa is grown in the altiplano of the Andes in Bolivia, Ecuador, and Peru, and some in Chile and Argentian. A pilot crop grows in Boulder, Colorado.
Quinoa has historically been the staple food of the Andes, traditonally eaten like rice, toasted and ground to make tortillas, and fermented to make chicha, a drink. As the "mother grain" of the Incas, quinoa was of such central importance to that civilization, that by destroying its cultivation, the Spaniards subdued the Inca Empire in one year.
Quinoa cooks up quickly in 15-25 minutes into a light, fluffy "cute curly" yellow grain. It has a gourmet look and a very delicate flavor. The flavor makes light crepes and waffles in our blender recipes. It is gluten-free, providing another grain choice for the gluten intolerant. With high protein and high lysine content, quinoa is one of the most nutritious grains. It is very expensive.
A substance on the surface of quinoa seed called saponins imparts a bitter taste and must be rinsed away. I rinse the seed in a strainer 1-2 minutes the evening before using it, soak it in a bowl of water overnight, drain it, and rinse again, about 1 minute. This procedure is included in our recipes for quinoa crepes, waffles, and creamed cereal." p., 75-76 BREAKFASTS By Sue Gregg, Reprinted by permission
CREAMY QUINOA
The added butter givesthis cereal an especially pleasing flavor. The rinsing and soaking of the grain is essential to remove bitter flavor (p.75 BREAKFASTSfor details)
AMOUNT: 2-3 servings (Double, triple as needed)
1. The night before, put quinoa in strainer and rinse for 1 minute:
1/2 cup quinoa
2. Set strainer with rinsed quinoa in a bowl filled with water so that it is submerged. Let stand overnight.
3. Discard water and rinse quinoa another 30 seconds.
4. Blend in blender on high speed about 1 minute:
1/2 Cup water
2 TB rinsed, drained quinoa
5. In saucepan bring water to a boil, stir in blender mixture and return to boil; stir in blender mixture and return to boil; stir in remaining ingredients:
1 Cup water
blender mixture
remaining rinsed, drained quinoa
1/4 tsp. salt
6. Lower heat, cover and simmer 20-25 minutes until water is absorbed; stir 2 or 3 times during cooking.
7. To serve, blend in 1 TB butter for an extra special flavor.
p. 106, BREAKFASTS By Sue Gregg, Reprinted by permission.
BLACK BEAN, RED PEPPER, CORN & QUINOA SALAD
This salad goes together quite easily, with gourmet flair,
it is colorful and declicious.
5 TB olive oil
1/2 C. Quinoa, rinsed thoroughly in cold water, drained
1 C. chicken broth
1/4 tsp. salt
1/4 tsp. cumin, ground
2 TB lime juice
1/8 tsp. black pepper
1 C. cooked or canned black beans, drained
1 C. whole kernel corn
1 C. ripe tomato, peeled, seeded, diced
1/2 C. sweet red pepper, seeded and chopped
2 green onions finely chopped
3 TB chopped cilantro (opt)
2 TB chopped parsley
2 C. mixed salad greens
1. In a 1 qt saucepan (or small pressure cooker) heat 2 TB oil over medium heat. Add Quinoa and stir until toasted and aromatic, about 5 minutes. Stir in broth, cumin, salt, heat to a boil over heat, until liquid is absorbed, about 15 minutes. Remove from heat & let stand 5 minutes fluff 2ith a fork, set aside to cool.
2. In medium bowl, whisk 4 TB oil, lime juice, and pepper. Stir in black beans, corn, tomato, red pepper, green onion, cilantro, parsely and mixed Quinoa.
3. Serving: Divide greens amond 4 salad plates. Spoon quinoa mixutre onto greens. Serve at room temperature or refrigerate 30 minutes before serving.
QUINOA SALAD - GREEK STYLE
2 Cups Cooked Quinoa (see above instructions for cooking
the grain)
1 Cup diced cucumber
5 Pepperocini's (bottled, optional)
1/2 Cup Feta cheese, crumbled
5-10 Cherry Tomatoes, quartered or halved
Oil and Vinegar Dressing or Greek Salad Dressing - contains oregano, pepper and garlic - To moisten or to taste!
To receive my free newsletter ON MY HEART which is published twice a month with information, product updates and reviews, delicious recipes and much more in the spirit of Titus Two, click here.
If you haven't tried my blue ribbon winning Marilyn's Famous Whole Wheat Bread Recipe, here is the link to the recipe.
Complimentary copies of our 64 page catalog of products for homemakers is available here.
Here is a list of grains and seeds you may wish to keep on hand
in your home. Economical whole grains and seeds pack high amounts
of a wide range of vitamins and minerals, valuable fiber and are
naturally low in fat. Grains, seeds, and nuts are perfect for
sprouting, baking, and side dishes. Make it a goal to try several
new grains in the upcoming weeks for taste, texture, nutrition
and flavor treats. The following information was adapted from
The
Sprouting Book by Ann Wigmore. Nutritional info is for
the sprouted grain or seed which may differ from the unsprouted.
Adzuki Beans - A good source of protein, vitamin C, and
iron.
Alfalfa - Pound for pound are one of the most nutritious foods you can eat. A very good source of Vitamins B-complex, C, K, E, and calcium, magnesium, selenium, iron, potassium, and zinc.
Almonds - Of all the spouted nuts, these are the easiest to digest. Excellent source of vitamins B and E, protein, calcium, potassium, magnesium, phosphorous, and fats.
Cabbage - A good source of vitamins A, C and U, along with trace elements iodine and sulfur.
Chick Pea - Rich in carbohydrates, fiber, calcium, and protein. Also provide magnesium, potassium, and vitamins A and C.
Fenugreek - A valuable blood and kidney cleanser and a good source of phosphorous and iron. Spices up a salad!
Lentils - The single richest source of high-quality protein. Great sprouted or in a variety of main dishes.
Millet - A mild-flavored highly digestible alkalizing grain. It is rich in protein, and calcium. A staple to the ancient cultures of Egypt, India, and China. Use the unhulled type for sprouting.
Mung Beans - A good source of iron, protein, potassium, and vitamin C.
Oats - A cereal grass that can be purchased as whole groats, and flaked, or steel cut, or rolled and flaked. A great addition to breads, cookies. Use the whole oat groats for sprouting.
Radish - Spices up your sprouting mix!
Rye - Gives a slightly sweet flavor to a sprout mix.
Sesame Seeds - Rich in fats, protein, fiber. vitamins, B, E, and several vital minerals.
Sunflower Seeds - Rich in B vitamins (thiamine, riboflavin, niacin. The sprouts are richer in these vitamins than the raw, unsprouted seeds.
Triticale - A new cereal grass with good protein content made by a hybrid cross of rye and wheat. Often found in seven grain mixes, and useful for wheat intolerant systems.
Wheat - The world's most cultivated grain. Wheat is found in many varieties and forms including durum used for pastas, hard wheat used for yeast breads, soft wheat used in pastries such as pancakes and muffins. Wheat bran adds nutrition to great muffins, couscous is cracked and pelletized endosperm of durum wheat, bulgur is steamed and cracked wheat, wheat germ is nutrient dense, and farina is coarsely ground endosperm of wheat. A great form of vitamin E, which functions as an antioxidant. Soft wheat works best for sprouting. Use in salads, desserts, breads, and cereals, and to make juice and milks.
ED NOTE: Hot cereal literally costs pennies per serving compared to boxed cereal, and represents an exceptional way to reduce grocery costs. With a little experience, and a few creative touches you can nourish your family without boredom and pocket the change!
All these hot cereals can be prepared in minutes in a DUROMATIC Pressure Cooker saving lots of time and energy consumption. Cut the water amount from 2 Cups to 1 1/2 cups. Bring the pressure up to the second red ring. Remove from heat, allow the pressure to drop naturally. Serve.
BAKED OATMEAL
Mix together:
1/2 Cup butter, melted (I used olive oil)
1 Cup brown sugar ( I used about 2/3 Cup)
2 eggs, beaten
Add:
3 cups rolled oats
2 tsp. baking powder
1 tsp. salt
1 cup milk
Mix well. Pour into a greased casserole dish 9 X 13 baking dish for 30 minutes at 350°F. I used a smaller baking pan and had to increase the baking time to 40 minutes.
Marilyn's Variation: Add 1-2 Cups finely chopped apple pieces.
APPLE OATMEAL
1 Cup rolled oats
2 Cups cold water
1/2 tsp. salt
Cook on low heat in a medium saucepan. Add in:
2 cups chopped apples
dash nutmeg
Cook 5 minutes longer or until apples are at a desired consistency. Serve with milk or yogurt, honey or brown sugard and a sprinkling of connamon. Yield: 4-6 servings
CREAM OF WHEAT
1 Cup cracked wheat kernels*
2 cups water
1/2 tsp. salt
Coarsely crack the wheat kernels. Combine the cracked wheat
kernels with water and salt in a suacepan. Bring to a boil, then
reduce heat to low. Cover and simmer for 15-20 minutes. S Serve
with a pat of butter and a drizzle of honey. The recipe below
for Hearty Cereal Topping is delicious with this hot morning cereal.
*I crack my whole wheat kernels in the BOSCH
mixer using the blender attachment. You must use a very strong
and powerful blender to accomplish this. The BOSCH MIXER has 700
watts. You can crack about 1 cup of kernels at a time. It would
be convenient to go ahead and crack up a container full and then
store it in the freezer.
HEARTY CEREAL TOPPING
(Ed. note: What a creative way to liven up hot cereal for breakfast!
Prepare this topping ahead of time for a very quick breakfast.)
1/4 Cup wheat germ
1/2 cup bran cereal
1/2 cup brown sugar, firmly packed
1/2 tsp. cinnamon
1/4 cup butter
1/4 cup hulled raw sunflower seeds
1/4 cup finely chopped walnuts or pecans
1/2 dried fruit, in small pieces
Preheat oven to 300 degrees. In a large bowl combine the first 4 ingredients. Add in butter and cut in with a pastry blender or fork until butter is in coarse crumbs and evenly distributed throughout the mixture. Stir in nuts an seeds. Spread mixture in a baking pan and bake for 10 minutes. Remove from oven and stir in dried fruit pieces. Coo and store in an airtight container in a cool dry place. use within 4-6 weeks. Use as a delightful topping on your hot cereal in the morning. YIELD: 3 Cups
BABY BEAR PORRIDGE
1 cup rolled oats
2 1/4 cups cold water
1/2 tsp. salt
2 TB cracked wheat
Combine water and salt in a medium saucepan and bring to a boil. Add in rolled oats and cracked wheat. Reduce heat and simmer gently until done, about 20 minutes. Stir occasionally. Serve with milk, and brown sugar, honey or maple syrup. Honey should not be fed to babies under the age of one. Serves 4.
GOOD MORNIN' MILLET CEREAL
(Ed note: millet is very high in calcium and other minerals.)
1 Cup hulled millet
3 Cups water
1/2 tsp. salt
Combine all ingredients in a medium saucepan, and bring to a boil. Reduce heat to low, and simmer 30-40 minutes. Serves 4. Serve with butter and honey. (If using the Duromatic Pressure Cooker, cook at the first red ring for 12 minutes and allow the pressure come down naturally.)
OATMEAL PANCAKES
Mix in a mixing bowl and set aside:
2 Cups rolled oats
3 Cups buttermilk
Mix in a separate mixing bowl:
3/4 cups unbleached all purpose flour
2 TB sugar
1 heaping tsp. baking soda
1 tsp. sea salt.
3TB cooking oil
Mix together oat mixture and dry ingredients. Stir until well blended. Cook on a hot griddle. Serve hot with syrup or honey.
To receive my free newsletter ON MY HEART which is published twice a month with information, product updates and reviews, delicious recipes and much more in the spirit of Titus Two, click here.
If you haven't tried my blue ribbon winning Marilyn's Famous Whole Wheat Bread Recipe, here is the link to the recipe.
Complimentary copies of our 64 page catalog of products for homemakers is available here.
Types of Wheat and Flours: If you know your ingredients you will have much better baking success. Read on....
All-Purpose Flour- the finely ground endosperm of the wheat kernel minus the bran and the germ which contain the highest concentrations of B-vitamins and Vitamin E. The flour is widely used for all home baked goods but devoid of nutritional content. It is generally enriched with flour B vitamins but not the original concentrations.
Bread Flour - contains greater gluten
strength and is generally used for yeast breads produced by commercial
bakers. It is now widely available in grocery stores for bread
machine enthusiasts.
Hard Winter Wheat -planted in the fall, usually
dry-land wheat grown without irrigation. Tends to be lower in
protein than hard spring wheat.
Hard Spring Wheat - planted in the spring. It is not irrigated thus yielding a high protein and low moisture content wheat kernel. This wheat tends to be more expensive because of the high protein content and makes the lightest whole wheat bread.
Pastry Flour - Has lower protein/gluten and is milled from Soft wheat. Used for baked goods that contain baking powder.
Soft Spring Wheat - Usually this wheat is irrigated. It has a larger yield than hard wheat but is lower in protein. It is used for making cake,s cookies, muffins, pancakes, pie crust, pastries and baked goods that use baking powder. Be sure to pack this flour into a measuring cup if it is freshly milled to get accurate measurements.
Durum Wheat - used for making pastas. Semolina is a grade of milling for Durum wheat.
Whole Wheat Flour -Commercially ground
whole wheat flour is coarse -textured and should be stored in
the freezer to protect against rancidity. Whole wheat flour is
rich in Bk-complex vitamins, vitamin E, protein, and contains
significantly more trace minerals and dietary fiber than white
flour.
Articles and Recipes authored by marilyn@urbanhomemaker.com. For more information please visit us at The Urban Homemaker Specializing in products for better health in the spirit of Titus Two.
1. Use fresh home-milled flour with all of the bran and fiber intact.
2. Use fresh yeast such as Saf Instant Dry Yeast. Because whole wheat produces a heavier dough, whole wheat bread dough often requires a better grade of yeast due to its superior rising ability. If your whole wheat bread is coming out like a brick it may be due in part to poor quality yeast.
3. Use warm water. Best temperature is 120 - 130°F
(if using SAF Yeast).
4. Use the right amount of flour. Home milled flour is
best. Too much flour causes dry crumbly bread. Here is information
about grain mill
comparisons.
5. Develop the gluten. The most difficult aspect of mastering bread baking is recognizing when the gluten is fully developed. When dough is properly kneaded it will be smooth and elastic. To improve the texture of your bread add Vital gluten.
6. Use 1 tsp. oil on your kneading surface or on your hands when it is time to shape the dough. This helps keep dough from sticking and avoids using excess flour.
7. Let the dough proof. Proofing is a baking term for allowing bread dough to raise outside of the oven. Although this step is optional (some let the dough rise in the oven prior to baking), proofing will develop flavor, gluten framework, and help make light, fluffy loaves of whole wheat bread.
To download my free ecookbook Fast and Health Recipe for Busy Homeschooling Moms, click on this link.
To receive my free newsletter ON MY HEART which is published twice a month with information, product updates and reviews, delicious recipes and much more in the spirit of Titus Two, click here.
If you haven't tried my blue ribbon winning Marilyn's Famous Whole Wheat Bread Recipe, here is the link to the recipe.
Complimentary copies of our 64 page catalog of products for homemakers is available here.